


StoreEngine is a powerful WordPress plugin designed to help you manage your online store efficiently. One of the core tasks in managing an online store is creating and managing customer accounts. With StoreEngine, adding customers is straightforward, and this guide will walk you through each step in detail.
By following this documentation, you’ll learn how to create a customer, manage their profile, view orders, subscriptions, and update payment methods. This helps ensure a smooth process for both you and your customers, making your store management easier.
Step 1: Access the Customers Section
In your WordPress dashboard, navigate to StoreEngine > Customers.
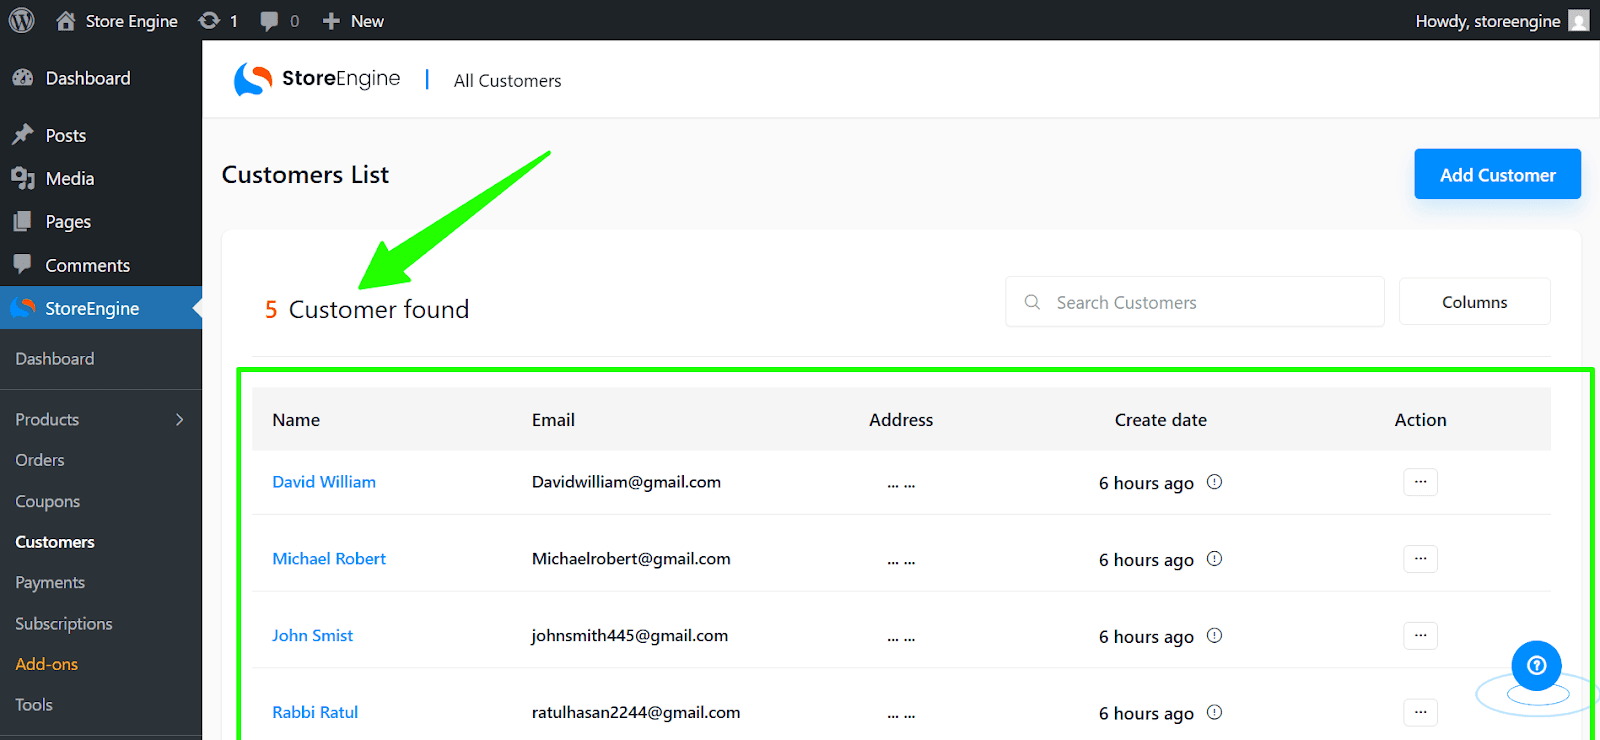
You’ll see the customer list. This page displays all your existing customers, with options to add or manage them.
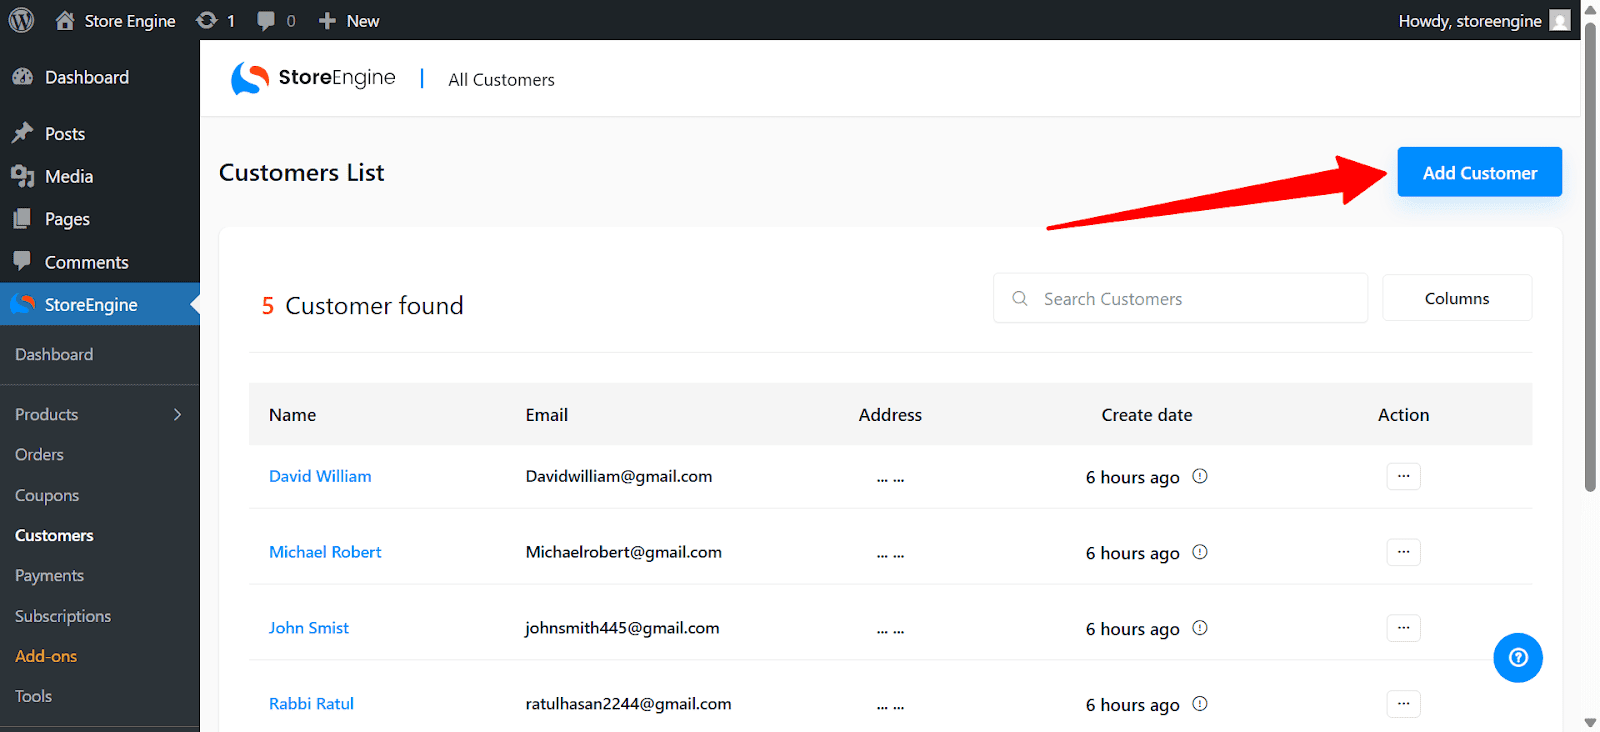
Step 2: Add a New Customer
Click the + Add Customer button at the top.
A new window will open with the following fields:
First Name: Enter the first name of the customer.
Last Name: Enter the last name of the customer.
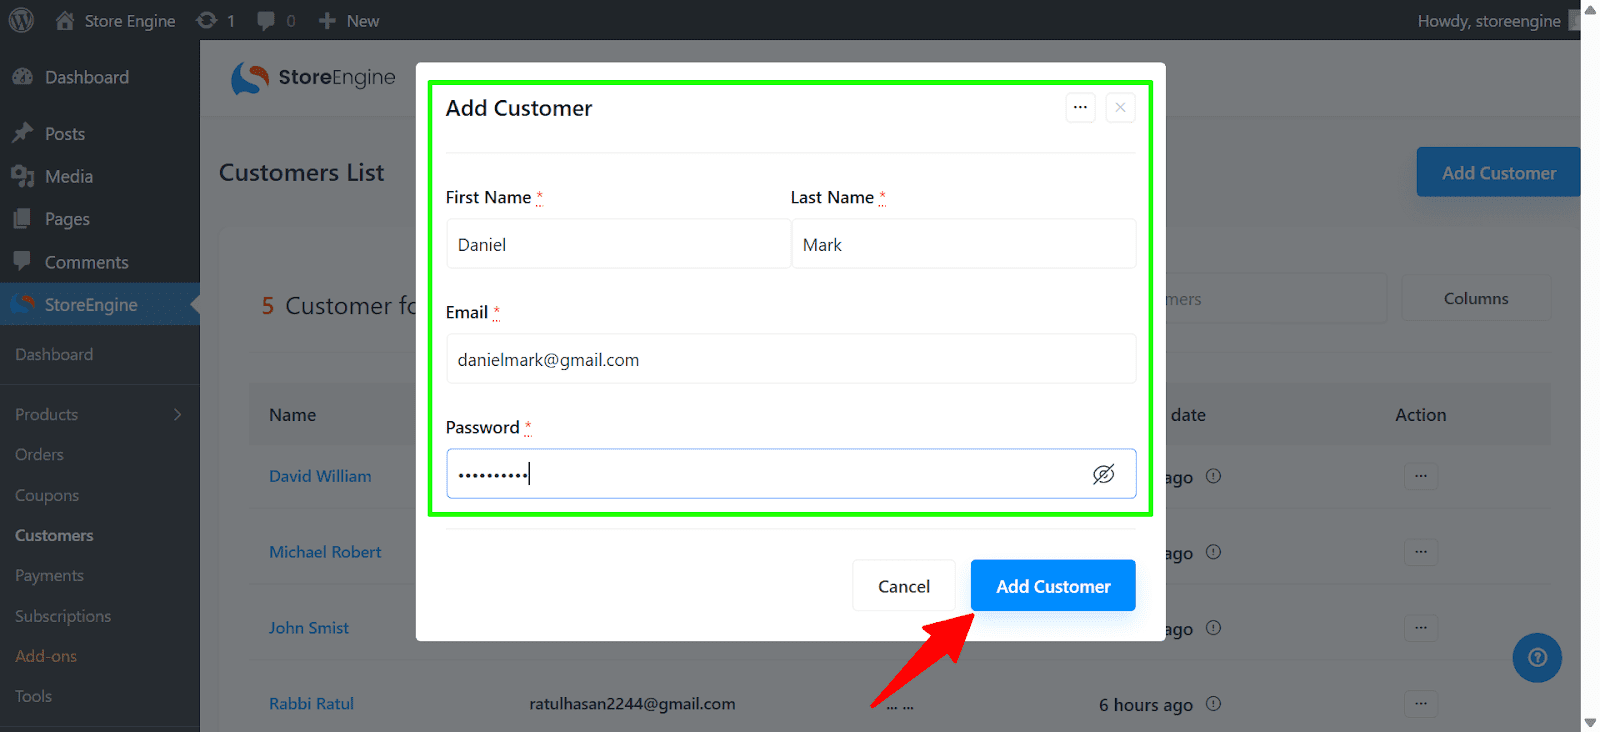
Email: Input the customer’s email address, which will serve as their login ID.
Password: Create a password that the customer will use to log in. It’s important to choose a secure password, and you may want to inform the customer to change it once they log in for the first time.
Once all fields are filled, click Add Customer to complete the process.
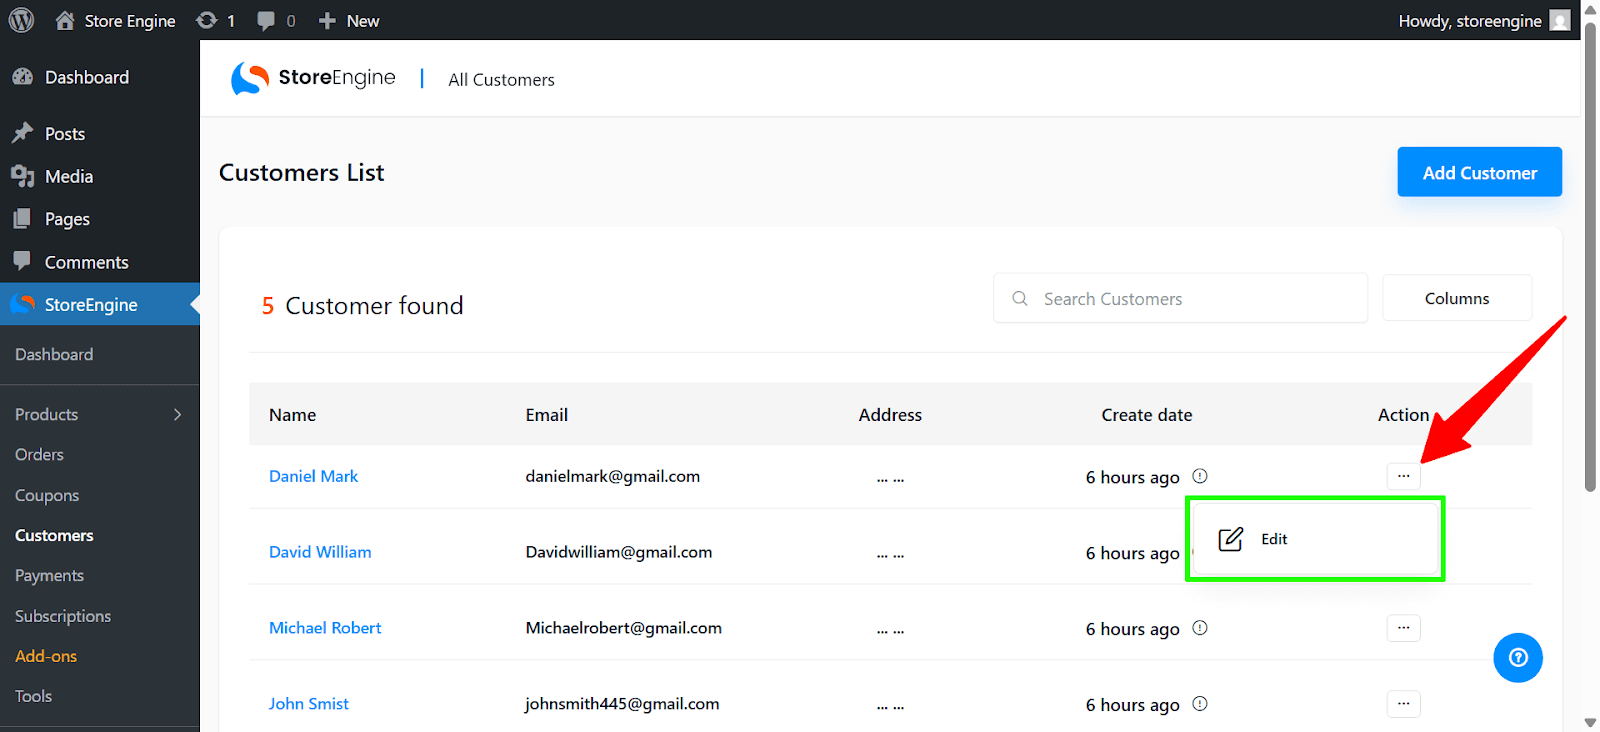
Step 3: Manage Existing Customers
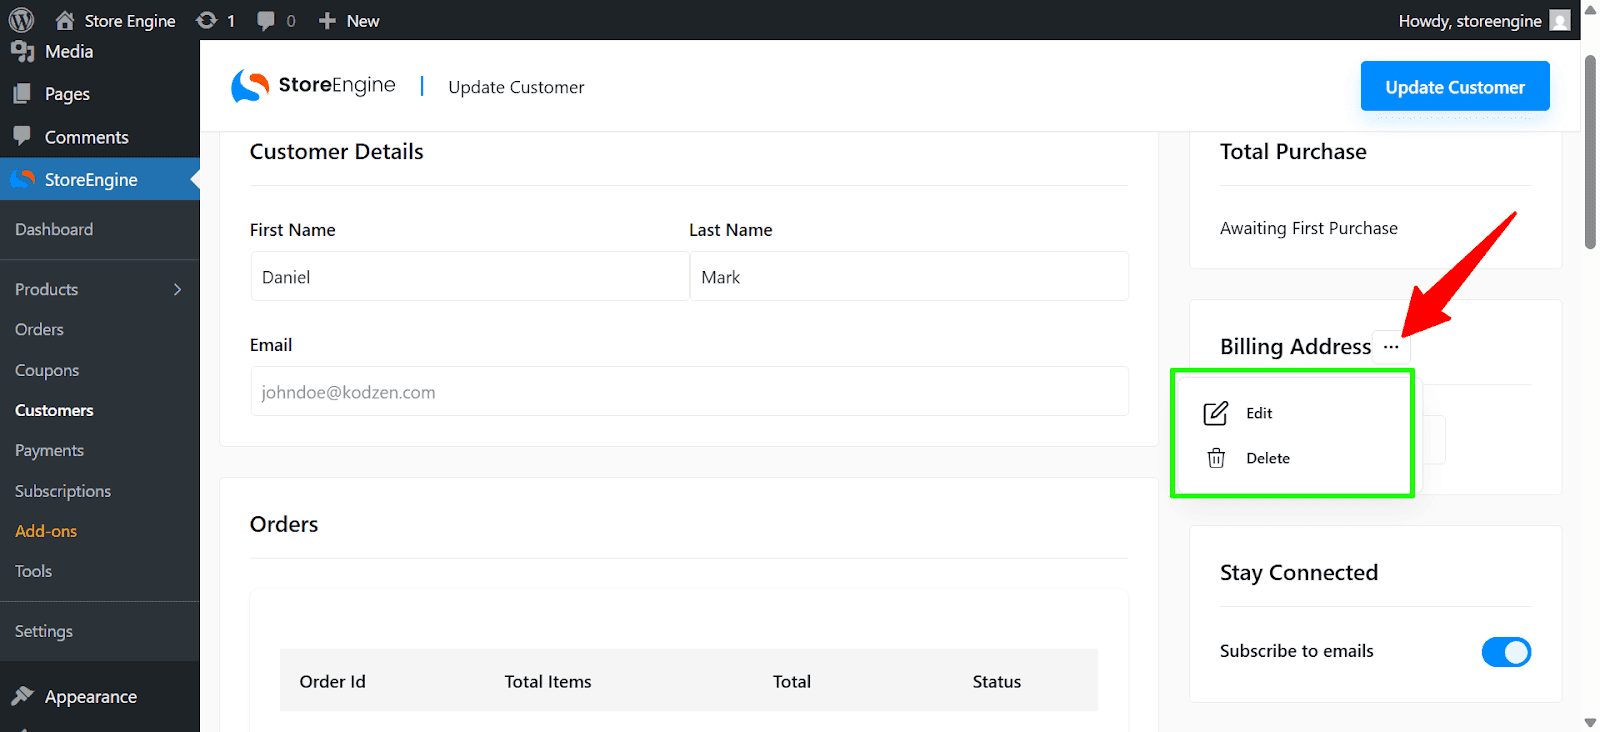
To modify or delete a customer, click on the customer’s name or the 3-dot menu next to their entry.
Edit: Selecting edit will allow you to change the customer’s first name, last name, email, or password.
Step 4: View Customer Details
Once a customer is added, you can view detailed information about them:
Customer Details: Displays their first name, last name, and email.
Orders: You’ll be able to see all orders placed by the customer, including the order ID, the total number of items, the total cost, order status (e.g., pending, completed), payment method (credit card, PayPal, etc.), and the date the order was placed.
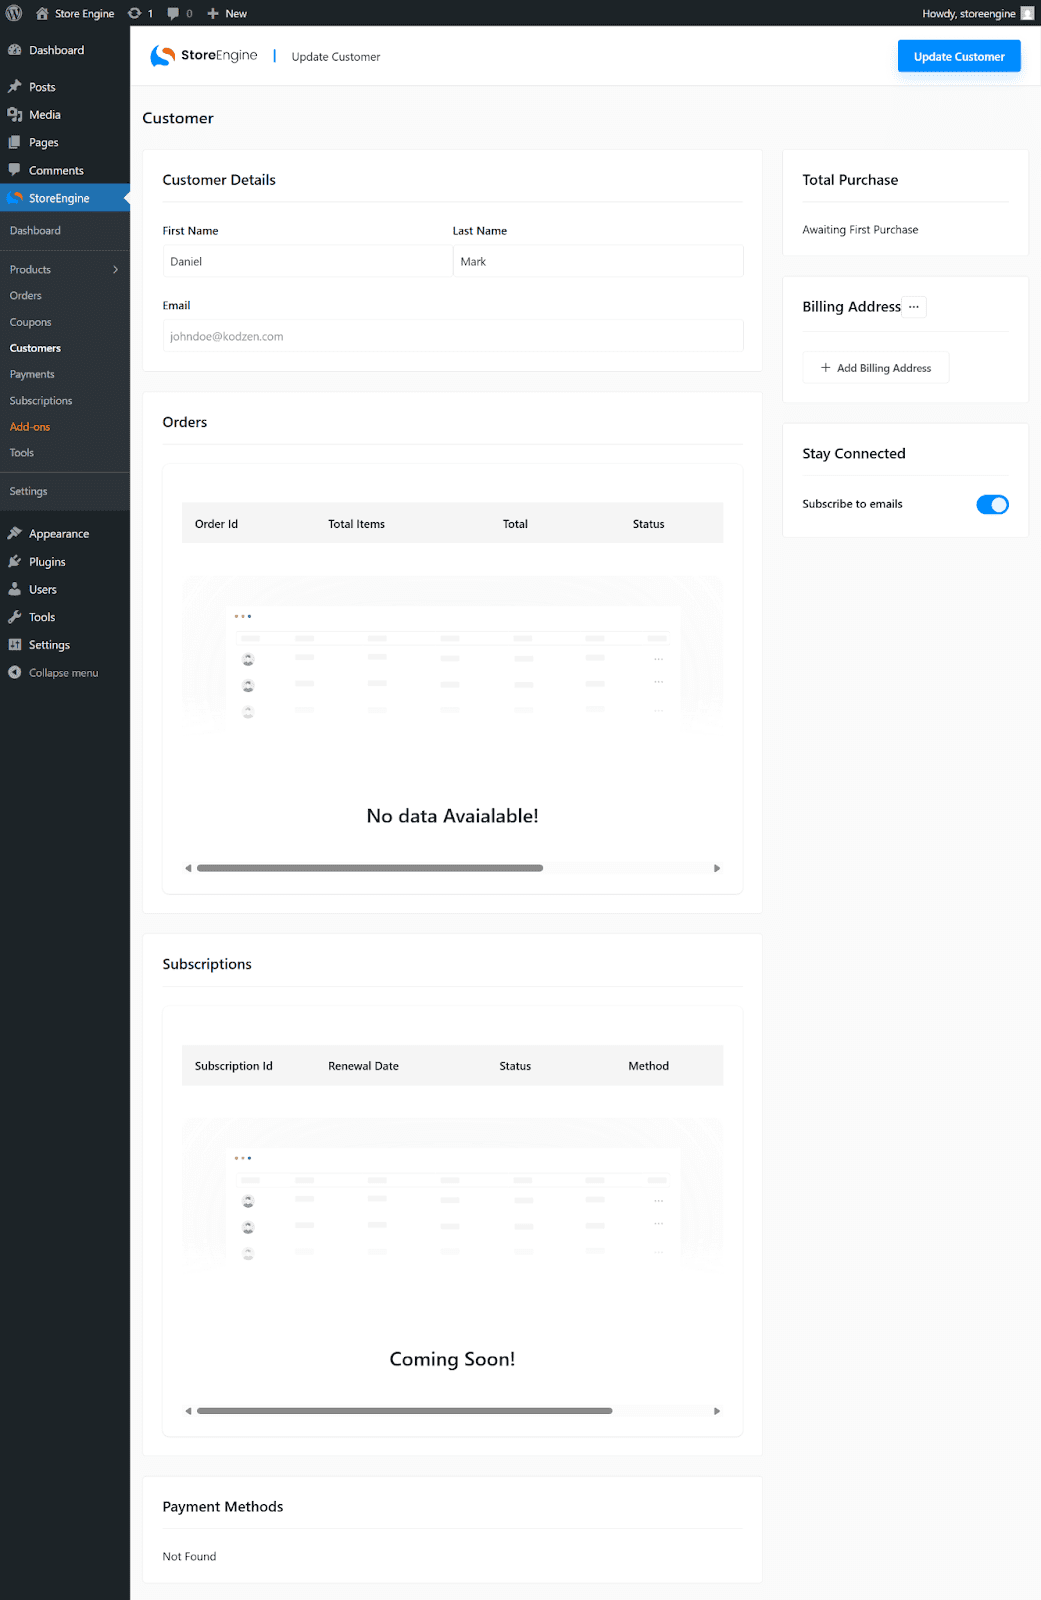
Subscriptions: Shows any active or previous subscriptions, including the subscription ID, renewal date, status (e.g., active, canceled), payment method, and subscription date.
Payment Methods: Lists the payment methods saved by the customer for future purchases.
Shipping Address: Displays the customer’s shipping address with fields like name, city, postal code, and country. To update or edit the shipping address, click the 3-dot menu and select Edit.
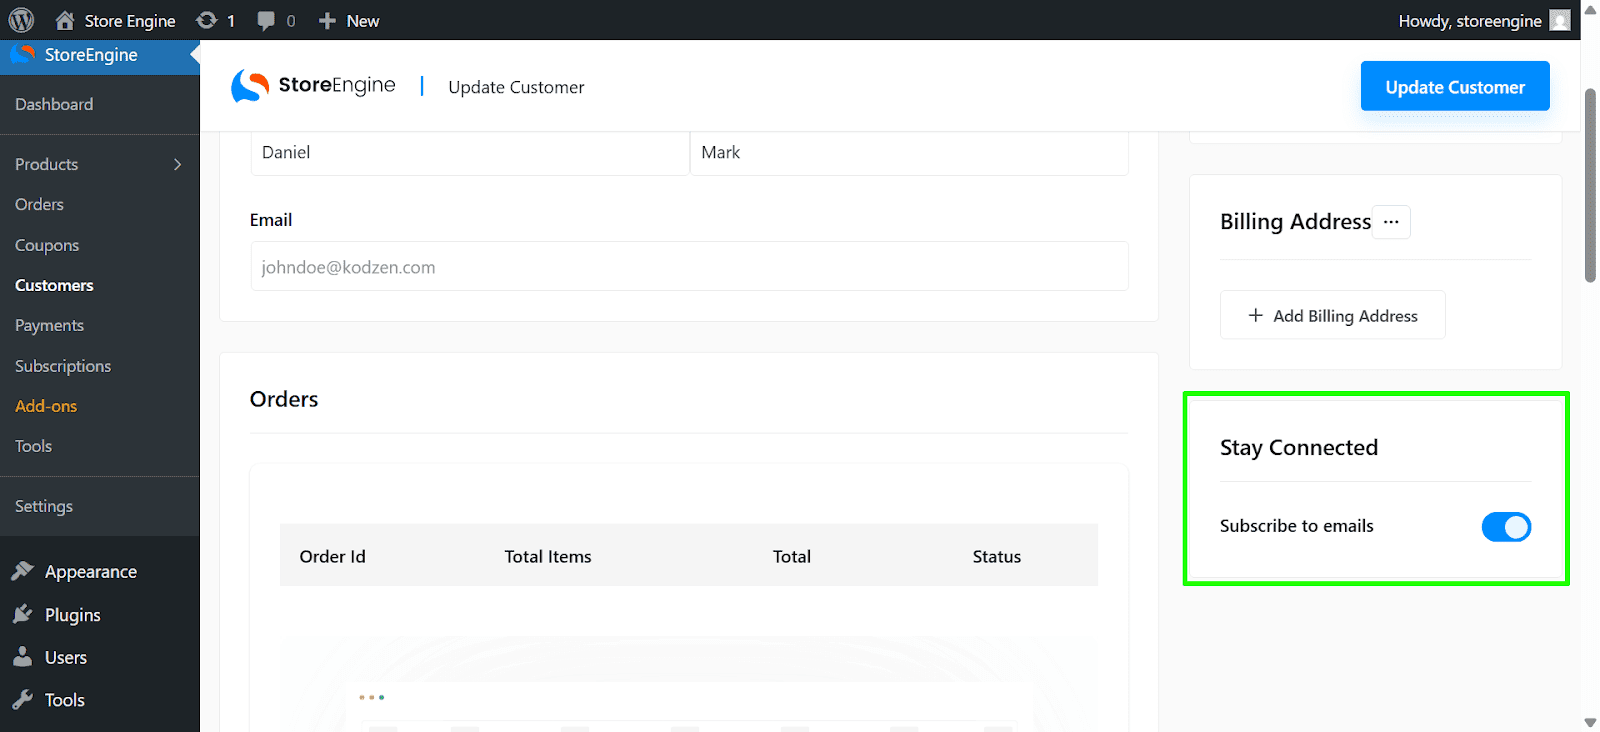
Step 5: Subscribe to Emails
On the customer details page, you will find an option to manage the customer’s email subscription settings. You can toggle a switch to subscribe or unsubscribe the customer from receiving marketing emails or product updates.
This documentation will help you manage your customer data with StoreEngine, allowing you to easily create, edit, and review customer profiles.