


Welcome to the StoreEngine Page Setup documentation. In this guide, we will walk you through setting up the essential pages required for your online store using StoreEngine.
Before we proceed, make sure you have already installed the StoreEngine plugin and completed the initial setup. If you haven’t done that yet, please check out the Installation section of our documentation.
Let’s Setup StoreEngine Necessary Pages
After installing and setting up your eCommerce store with StoreEngine, you will need to configure the mandatory pages to ensure your store functions correctly.
We assume that you’ve already installed the StoreEngine plugin on your site. Now, log in to your WordPress dashboard and navigate to the Pages section.
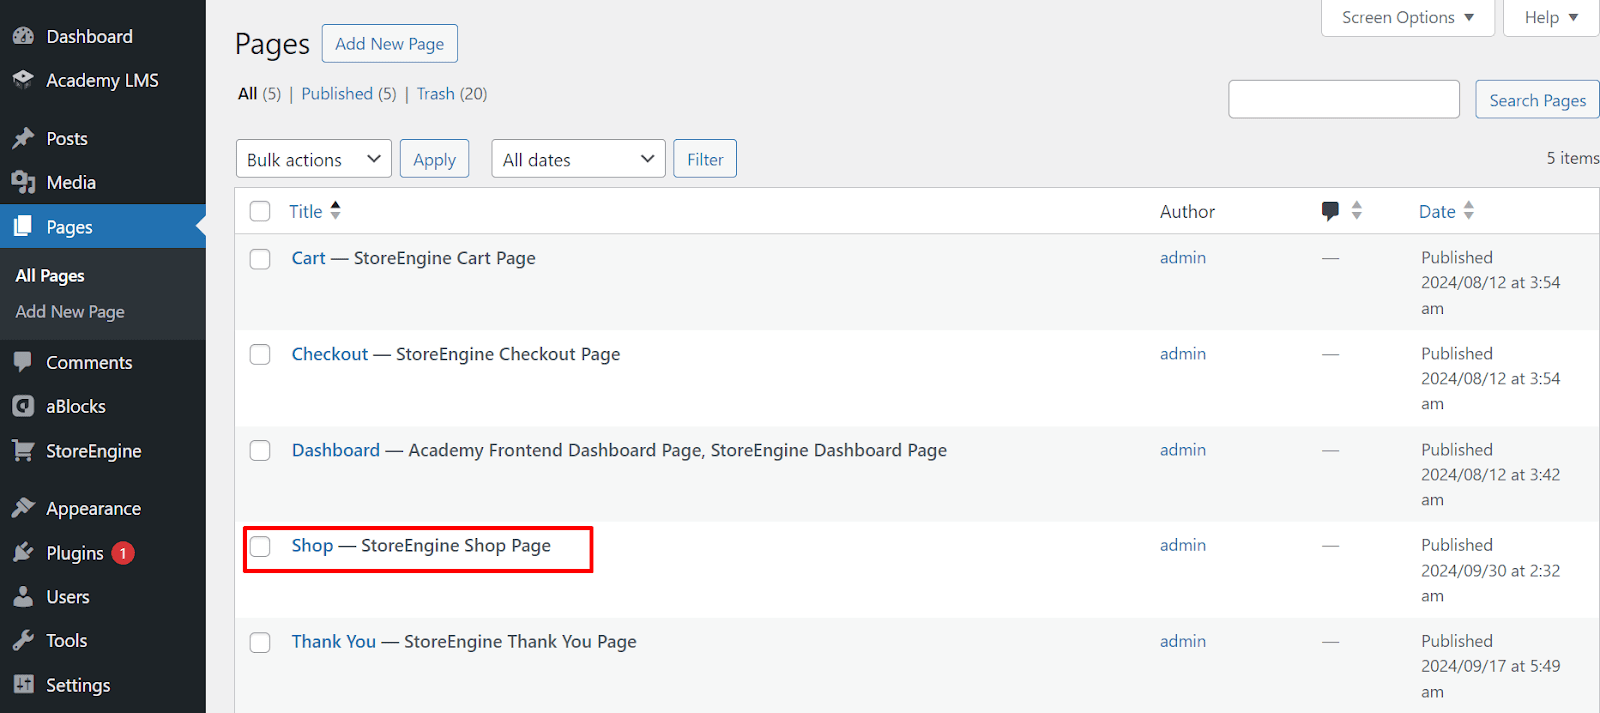
StoreEngine Default Pages
Upon installation, StoreEngine automatically creates the following essential pages on your website:
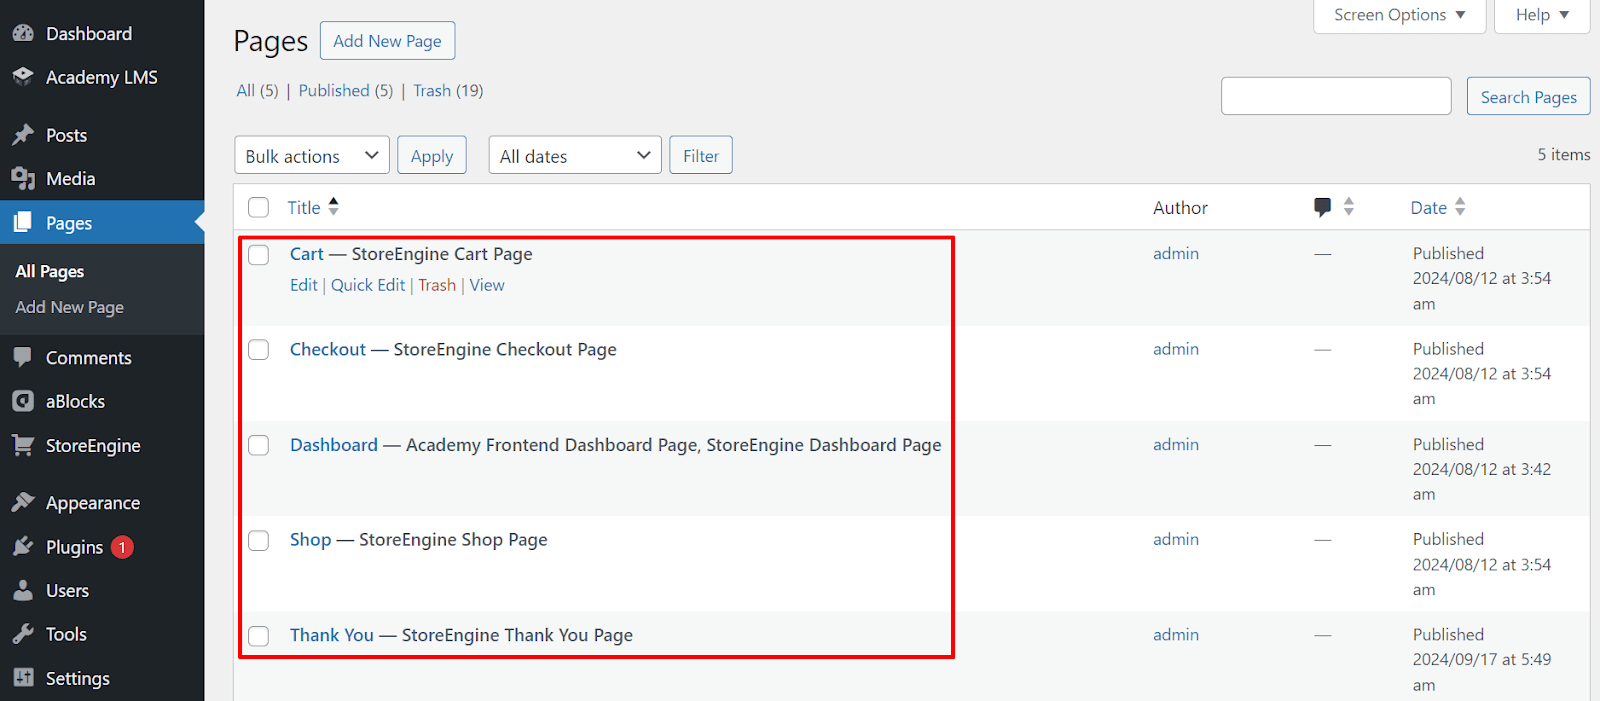
- Shop
- Cart
- Checkout
- Thank You
- Dashboard
However, if any of these pages are missing, don’t worry! You can manually create and assign them to StoreEngine by following these simple steps.
Creating and Linking Pages
Shop Page Creation
If the Shop page isn’t available in your Pages section, you can create one easily.
Go to Pages → Add New.
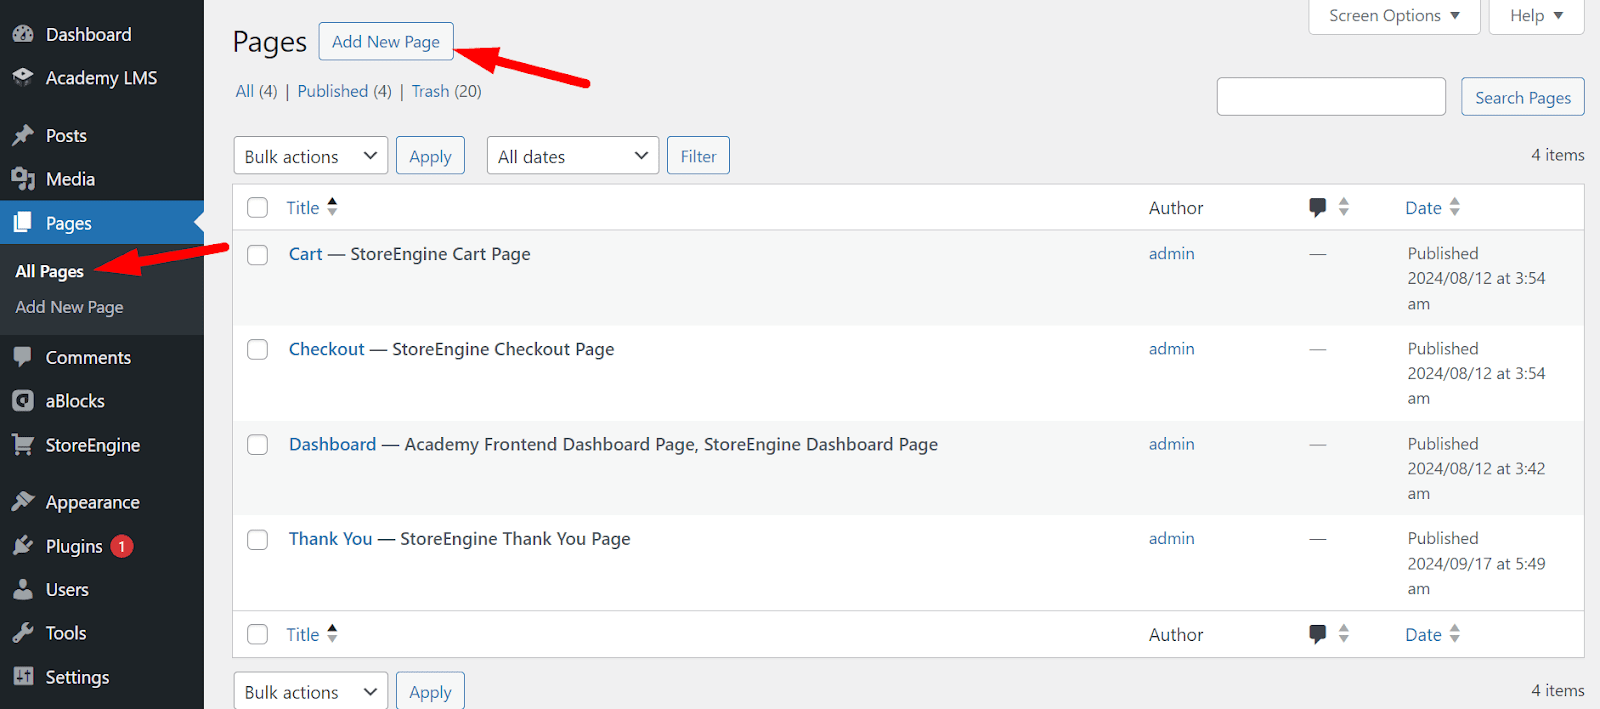
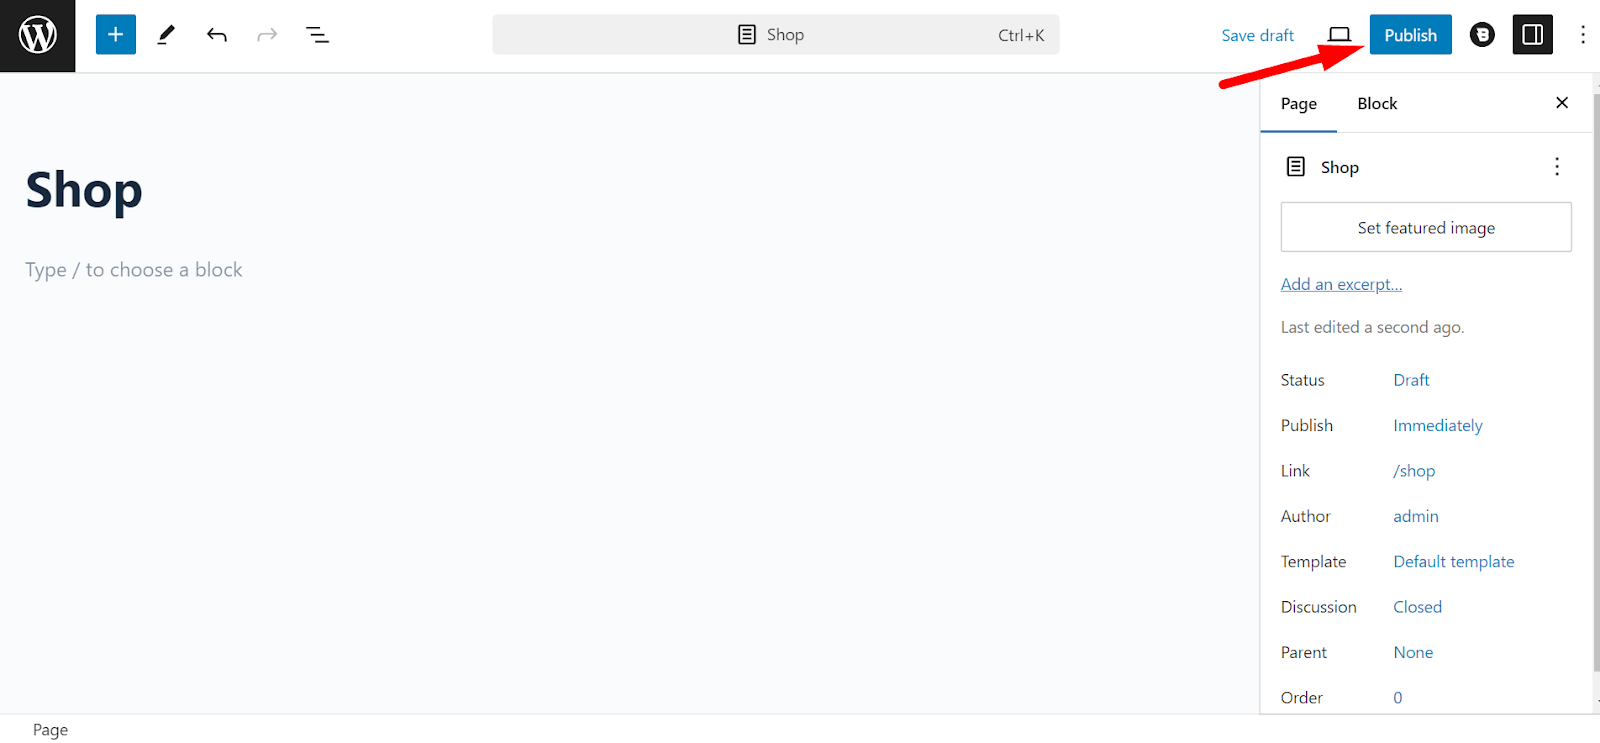
Name the page Shop. Click the Publish button to create the page.
Now, to link this page with StoreEngine:
Go to StoreEngine → Settings. Select the Page Setup tab.
From the Shop Page option, choose the page you just created from the dropdown list. Click Save to confirm the changes.
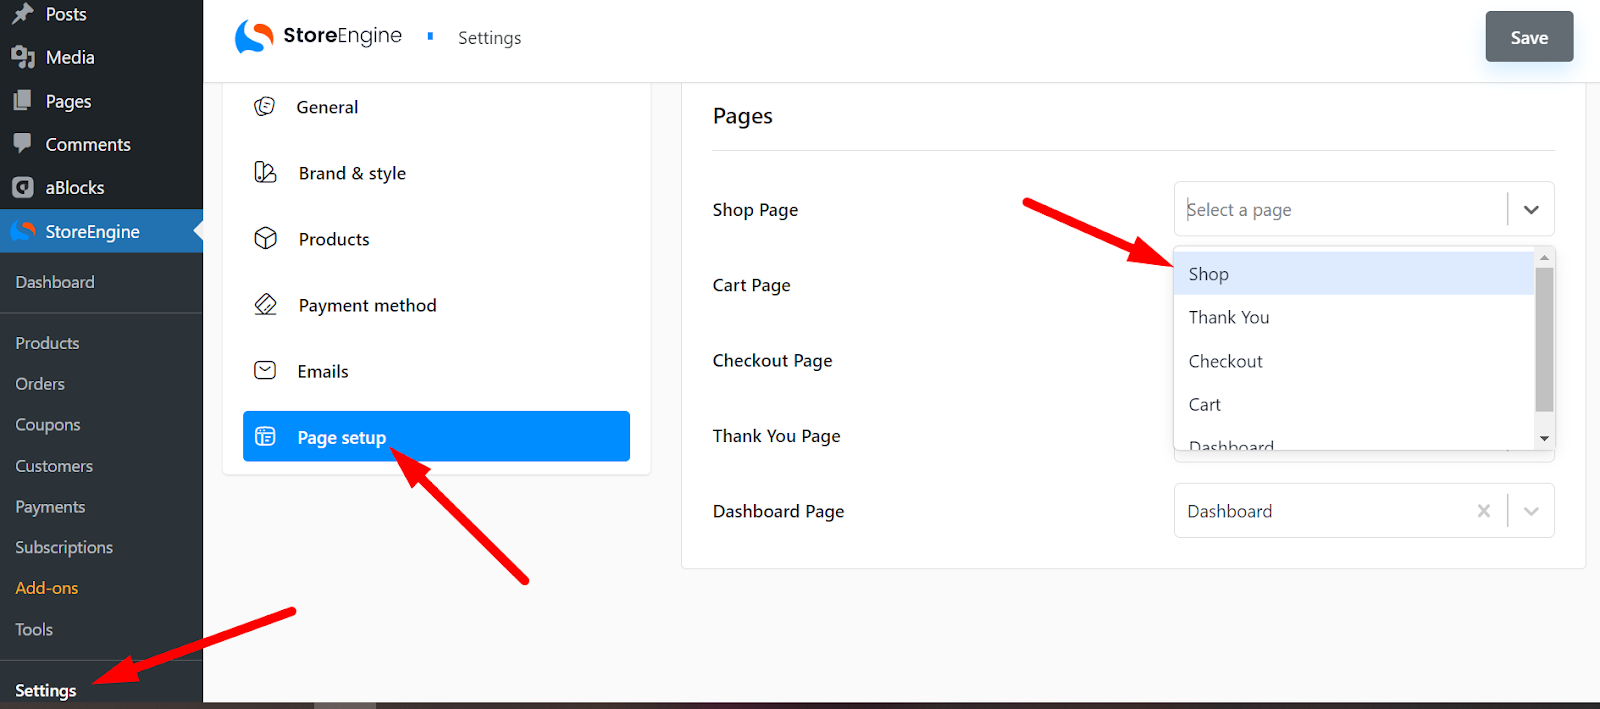
Your Shop page is now linked to StoreEngine and ready to display your products.
Follow the process mentioned above to create the rest of the necessary pages (Cart Page, Checkout Page, Thank You Page, and Dashboard Page) for your online store site using the StoreEngine plugin.
Setting Up Permalinks for Your Pages
To make sure your pages are accessible and user-friendly, it’s important to configure your permalinks correctly. Here’s how you can set them up:
Navigate to Settings → Permalinks. Choose any option other than Plain (we recommend Post Name for SEO-friendly URLs). Click Save Changes.
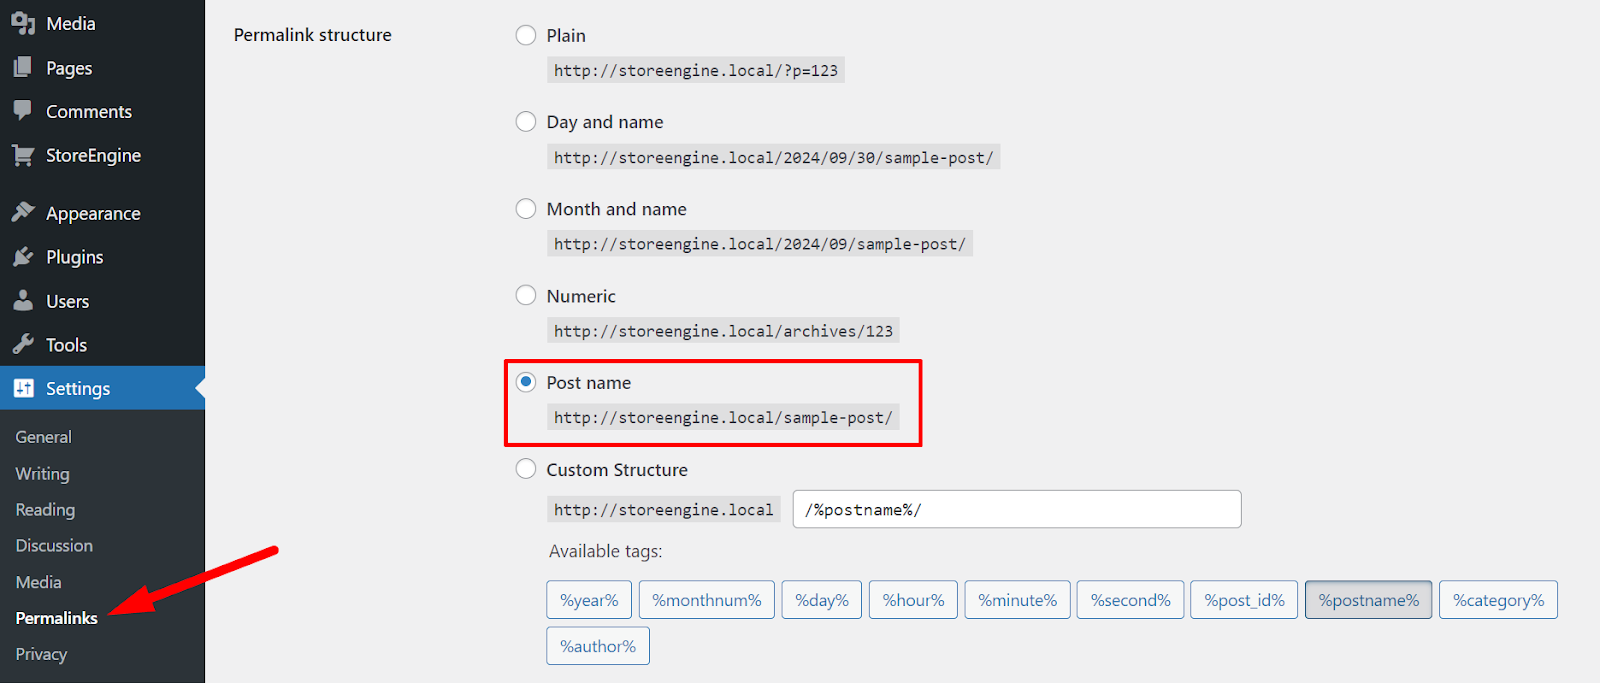
This will ensure that your pages have clean URLs, improving both user experience and search engine rankings.
With these steps completed, your StoreEngine-powered online store is ready to serve customers! If you run into any issues or have further questions, don’t hesitate to contact our support.