


To smoothly run an online store, you need to offer various payment methods that suit your customers. StoreEngine, a WordPress plugin, makes this easy by providing built-in options for handling payments.
Whether you’re accepting bank transfers, checks, cash on delivery, or online payments via PayPal or Stripe, StoreEngine allows you to configure each method to match your business needs.
Let’s go step by step to show you how to set up these payment options and get your store ready for transactions.
How to Set Up Payment Methods in StoreEngine?
To configure payment options in StoreEngine, follow these steps:
Step 1: Access Payment Settings
Go to StoreEngine > Settings > Payment Method to view the list of available payment methods. By default, you’ll find four options:
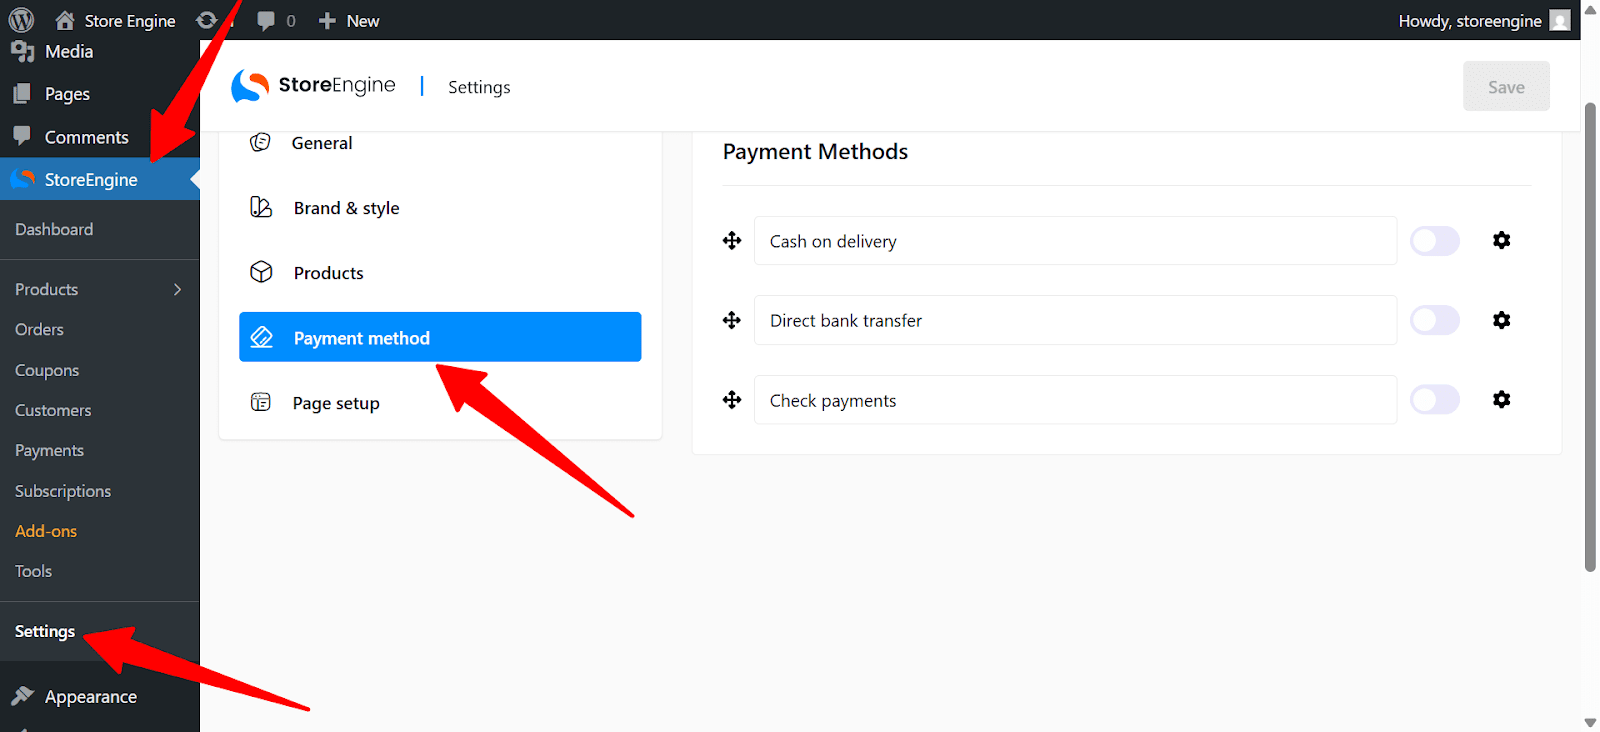
- Bank Transfer
- Check Payment
- Cash on Delivery
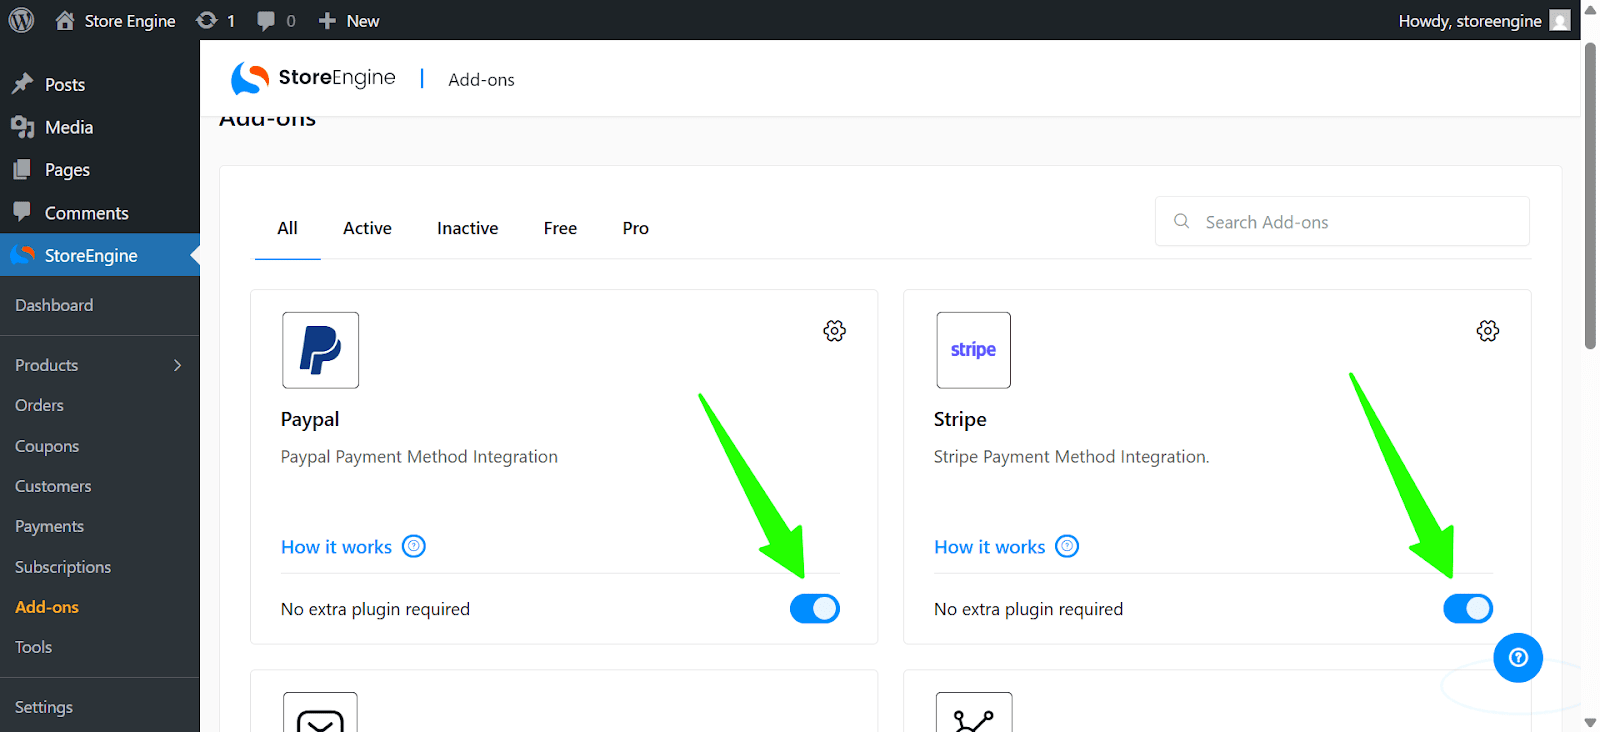
You can also add PayPal and Stripe here. To do that, go to StoreEngine>Add-Ons and enable PayPal and Stripe Add-Ons.
Step 2: Enable Your Preferred Payment Methods
Toggle your preferred payment method on or off. Multiple methods can be activated.

You can also drag to reorder them based on how you want them displayed to customers at checkout.
Step 3: Configure Each Payment Method
Here’s how to configure each payment option in detail.
Bank Transfer
Click the settings icon beside Bank Transfer.
Add Title, Description, Instructions, and account details (Name, Number, Bank, Routing Number, IBAN, BIC/Swift). Use +Add Account to enter multiple accounts.
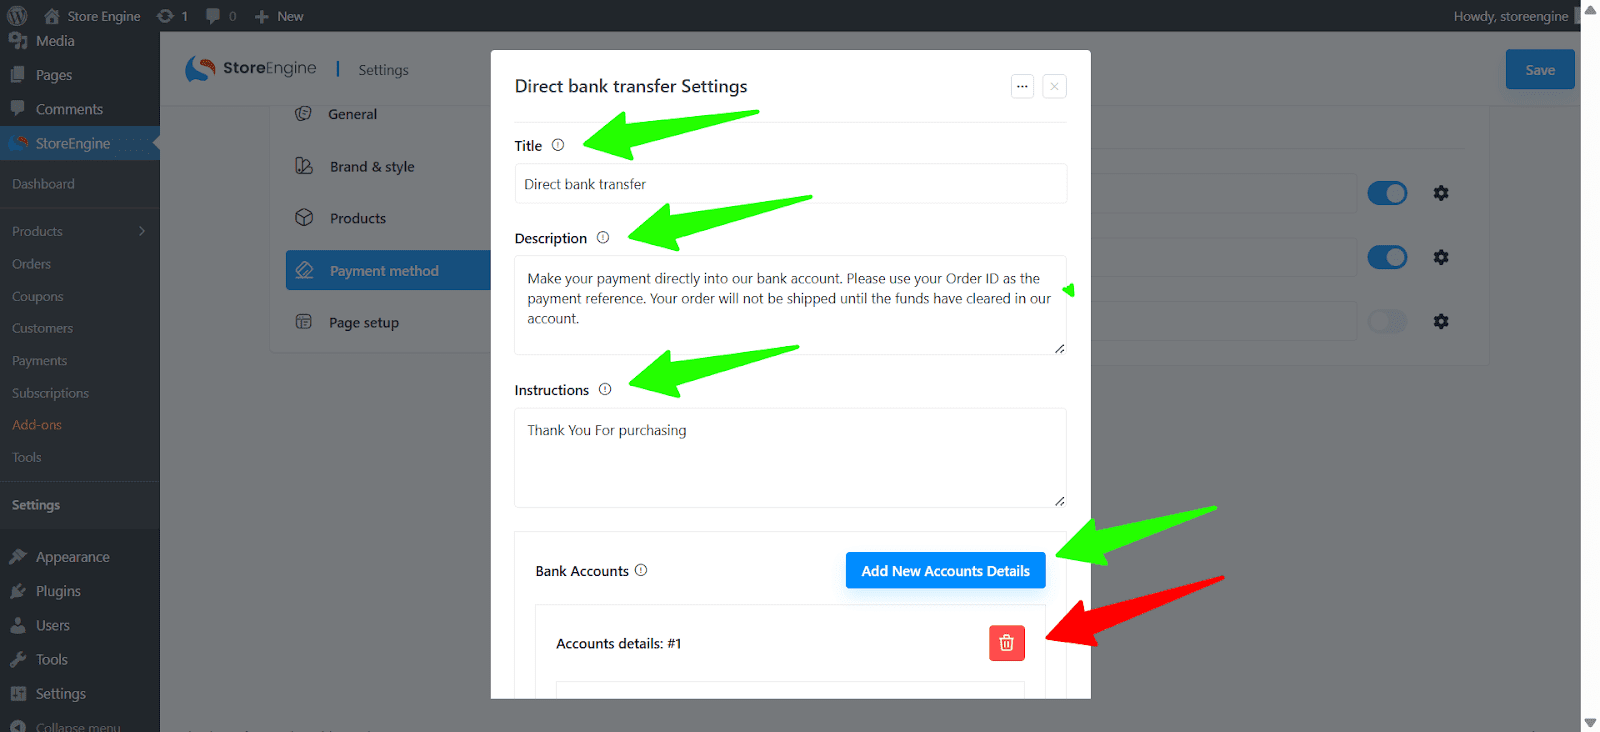
Here’s what these things actually work for:
- Title: Visible to customers during checkout.
- Description: Explain how the transfer will work.
- Instructions: Guide the customer on the steps for completing the payment.
- Accounts: Add multiple accounts using the +Add Account button.
To remove an account, click the remove account button.
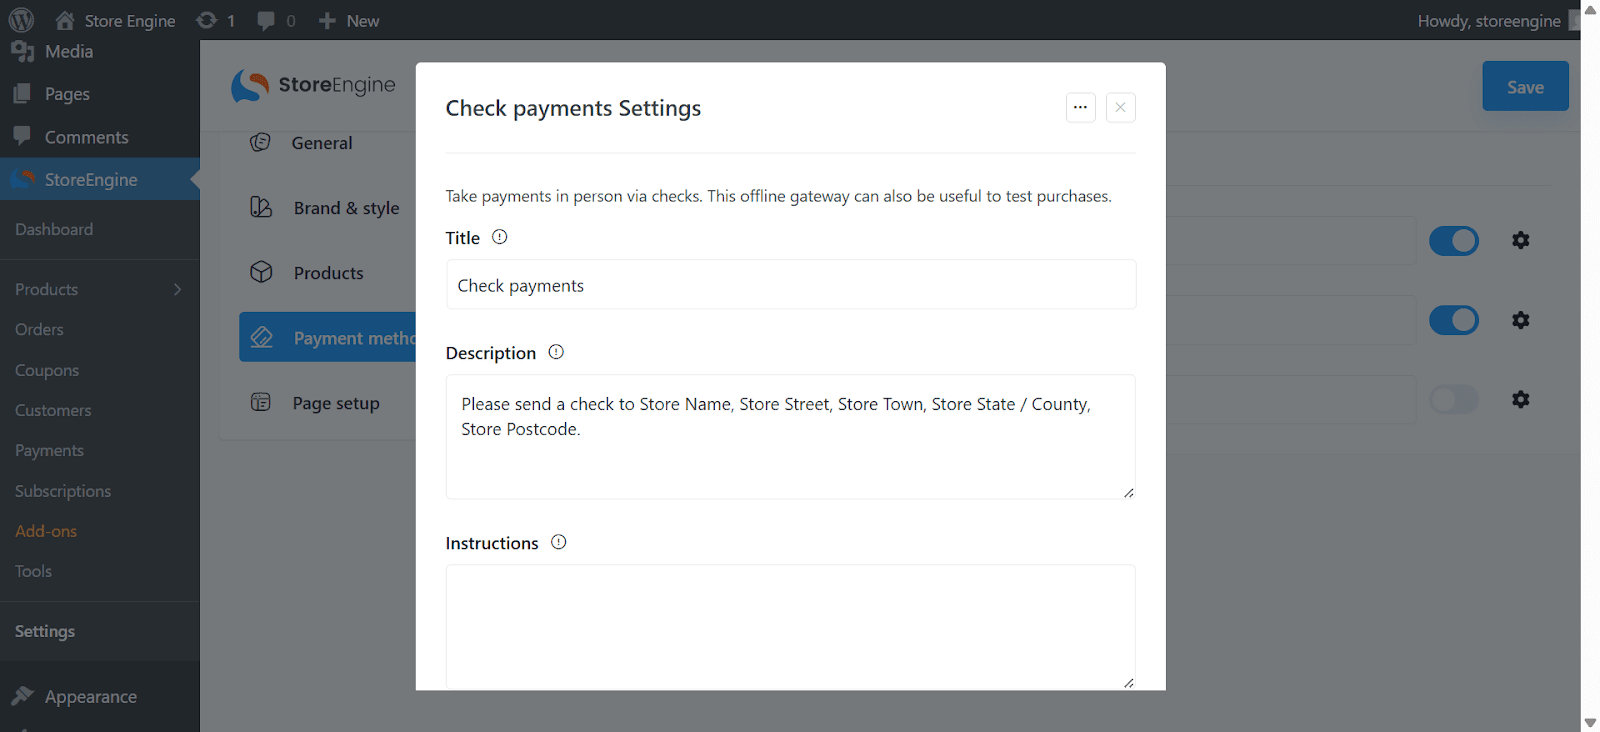
Check Payment
Click the settings icon beside Check Payment. Enter Title, Description, and Instructions for check payments.
Cash on Delivery
Click the settings icon beside Cash on Delivery. Add Title, Description, and any specific instructions.
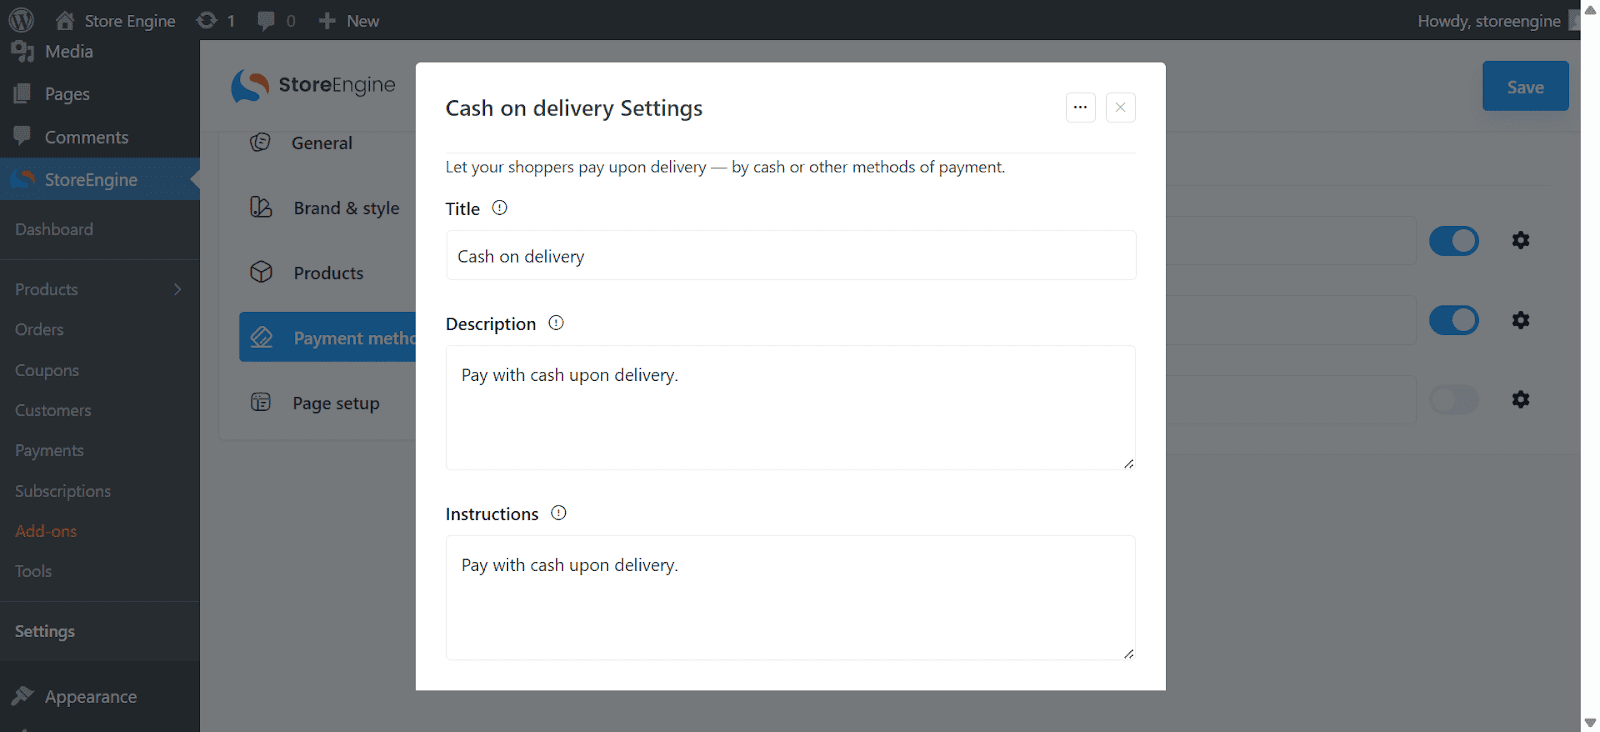
If using shipping methods, enable Accept for Shipping Methods. Also, you can enable Accept for Virtual Orders if you’re selling virtual products.
Stripe
Click the settings icon beside Stripe. It will open a new window with a set of options.
To enable test mode, turn off the live mode. Otherwise, keep it enabled if you want the payment method to be Live.

Enter the Title, Description, Live Secret Key, and Live Publishable Key. To obtain these keys and API setup details, follow Stripe’s instructions by referring to their official documentation here (Stripe documentation).
PayPal is the same as Stripe. You can set it quickly.
Step 4: Finalize Payment Setup
Once you’ve configured your preferred payment methods, you’re all set! Your customers will be able to choose from these options during checkout.
This setup allows you to offer flexibility in payments and makes the buying process smooth for your customers.