


This document describes StoreEngine’s Order Bump feature in full: what it is, how it works, how to configure it, display logic, integrations with the cart/checkout flow, troubleshooting, analytics, developer hooks, examples, and best practices. It mirrors a typical order-bump reference structure so you can implement and optimize order bumps quickly and reliably.
Overview: What is an Order Bumps?
An Order Bump is a one-click, targeted offer shown to customers during checkout to increase Average Order Value (AOV). In StoreEngine, an order bump is a separate product that can be presented on the checkout screen with its own price, discount, description, and display rules. Customers can add the bump to their order without leaving checkout.
Purpose:
- Increase incremental revenue by offering complementary, low-friction products or services at point of purchase.
- Encourage add-ons (guides, support, upgrades, templates, trials) with minimal UX friction.
- Work with both physical and digital products, and with payment/subscription flows supported by StoreEngine.
Enable the Order Bumps Addon
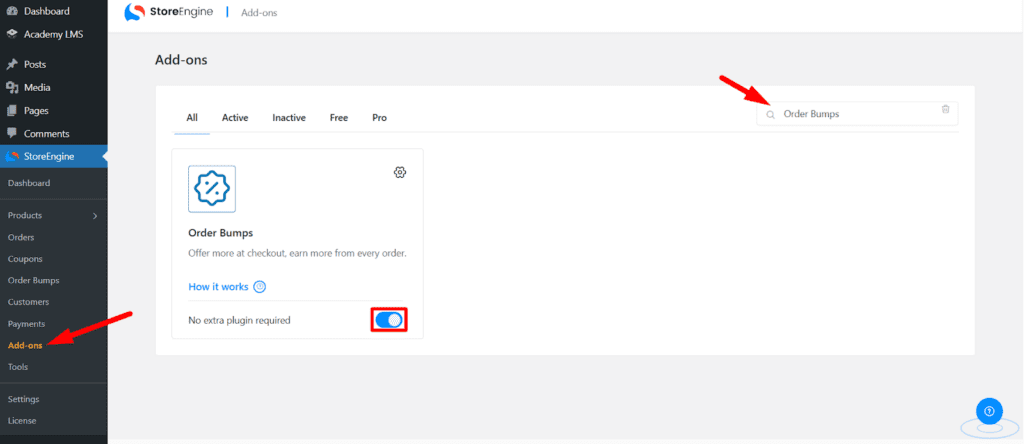
Before creating your first order bump, make sure the addon is active.
How to enable it:
- Go to your StoreEngine Dashboard.
- From the left navigation, click StoreEngine → Addons.
- Scroll through the list and find Order Bump.
- Toggle the switch to turn it ON.
Once enabled, the Order Bumps menu will appear and you can start creating bumps right away.
That’s all — the feature becomes fully available as soon as the addon is activated.
Key Concepts & Terminology
- Bump Product—the product that will be offered as the bump.
- Display Condition—rules that determine when the bump is shown (product in cart, cart total range, customer role, etc.).
- Auto Apply—when enabled, the bump discount is applied automatically (no user click required). When disabled, the customer must accept the bump.
- Priority—an integer (0–10) that controls ordering when multiple bumps are active.
- Attachment Rate—percentage of customers who add the bump when shown.
- Incremental Revenue—revenue generated by bumps (not including base product).
Step-by-step: Create an Order Bumps
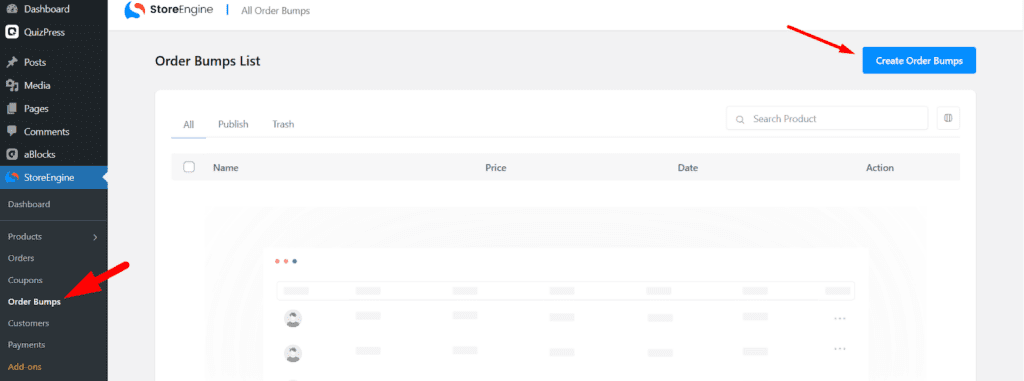
- Open Order Bumps admin
Go to StoreEngine → Order Bumps and click Create Order Bumps.
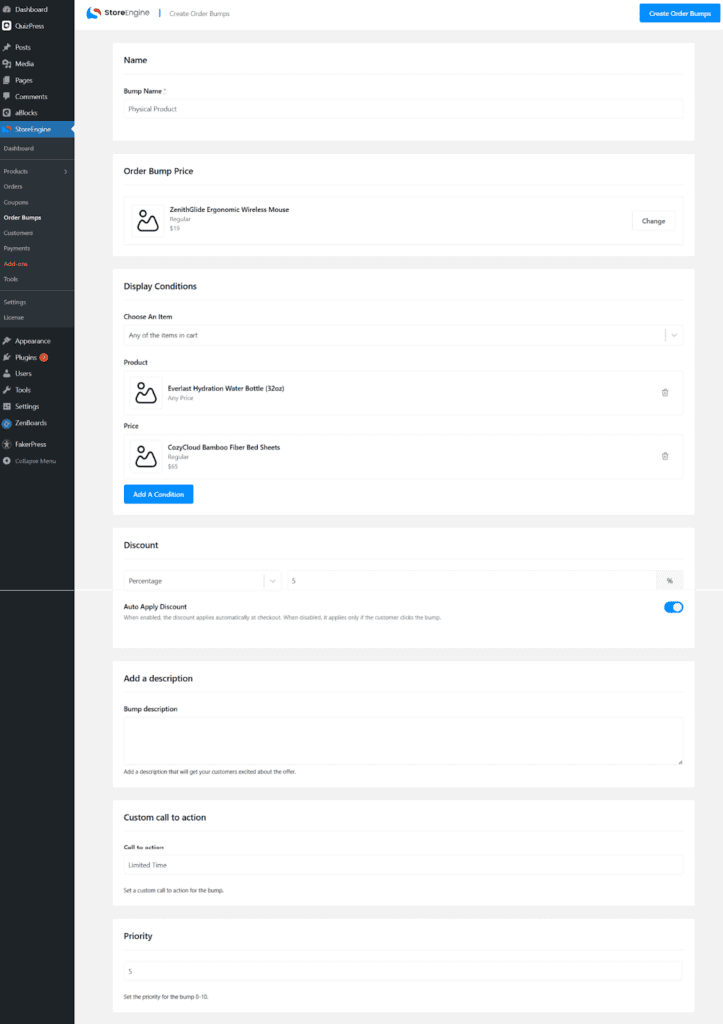
- Name
Enter a clear internal bump name (e.g., Course Companion Pack).
- Order Bump Price
- Select a price type or product.
- Display Conditions
After naming the bump and selecting its price, you define Display Conditions to control when the offer shows.
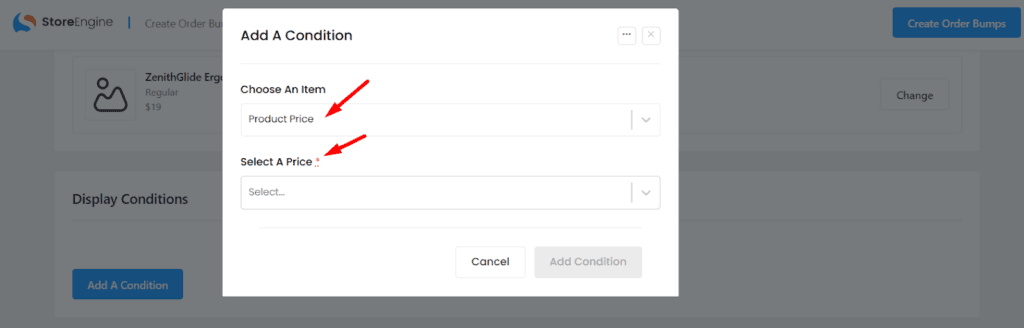
Click Add A Condition.
- In the pop-up, Choose An Item (default is Product Price).
- Based on the item, use the dropdown (e.g., Select A Price) to define the specific rule.
- Click Add Condition to save and apply the rule. This condition determines the cart criteria necessary to trigger the order bump display.
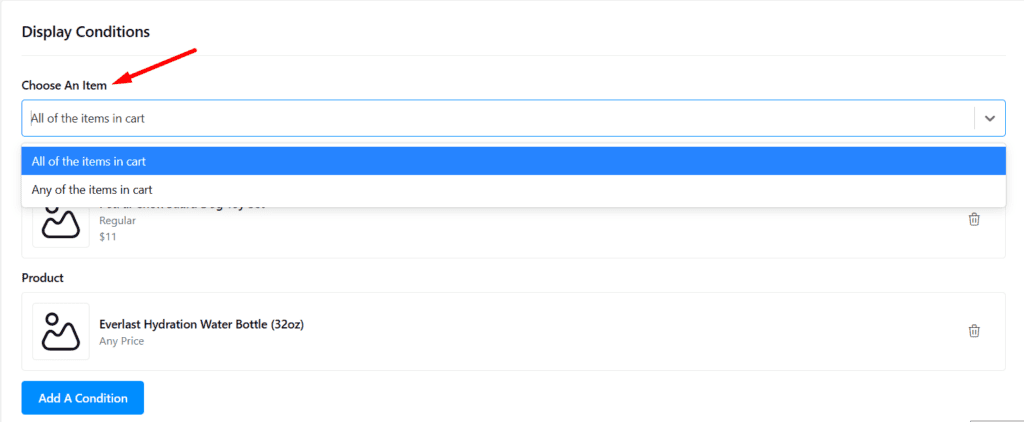
After defining the condition products, the Choose An Item dropdown determines how those products must be present in the cart:
- All of the items in cart: The bump shows only if every single conditioned product is in the cart.
- Any of the items in cart: The bump shows if at least one of the conditioned products is in the cart.
- This setting controls the overall flexibility of your order bump rule.
- Discount

- Choose Discount Type: Percentage or Fixed Amount (or none).
- Enter discount value. Example: Percentage = 25% or Fixed = $9.
Auto Apply Discount toggle:
- ON = The discount applies automatically at checkout when the bump qualifies based on the cart requirements.
- OFF = Customer must click the bump to add and get discount.
- Add a description
- Enter a short description to show on the bump card (1–2 lines ideally).
- Keep benefit-first copy: what problem it solves, 1–2 short bullets.
- Custom Call to Action
Enter a CTA label (e.g., Add Companion Pack — $19) — this sets the text of the accept button.
- Priority
- Set priority 0–10 (higher number typically shows before lower when multiple bumps apply).
- Use priority to control display ordering for multiple simultaneous bumps.
- Save
Click Create Order Bumps / Save to enable the bump. Test in checkout to confirm display and pricing.
Checkout Integration
Once conditions are met, the Order Bump appears on the checkout page, typically within the Order details section.

Display: The bump is shown in a prominent, separate box, often highlighting value (e.g., “LIMITED TIME,” “Save 5%”).
Acceptance Mode:
When Auto Apply Discount is enabled, the system first checks whether the cart meets the order bump’s display conditions.
If the bump product is already in the cart, the discount is applied automatically to that product.
However, the bump product is NOT added to the cart automatically.
If the bump product is not already in the cart, the order bump will only be displayed as an available option, but it will not be pre-selected or added automatically.
If Auto Apply Discount OFF, the customer must click the CTA to accept.
Final Order: The bump’s price seamlessly integrates into the final Subtotal and Total below the main cart items.