


The Razorpay integration allows you to accept secure payments in your StoreEngine store through credit/debit cards, UPI, net banking, and wallets. It’s fast, reliable, and PCI DSS compliant, ensuring safe transactions for your customers.
In this documentation, we’ll show you how to set up Razorpay in StoreEngine.
Enable Razorpay Addon
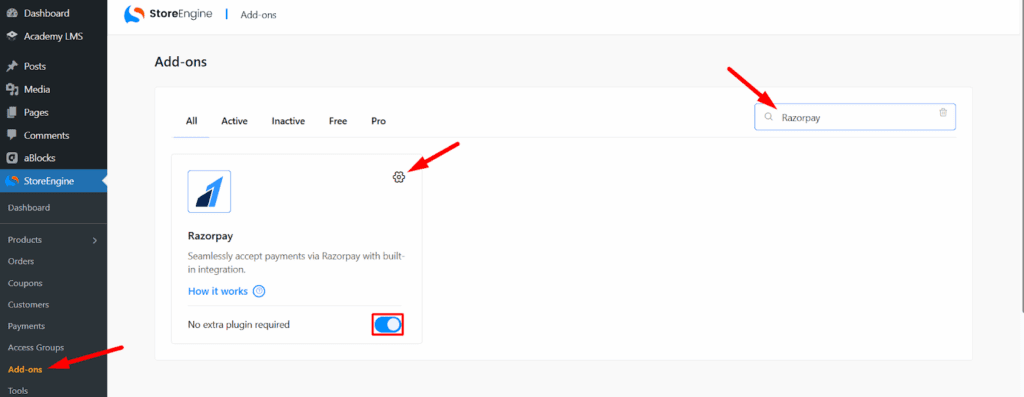
Before setting up Razorpay, you need to enable the addon in StoreEngine.
From your WordPress dashboard, navigate to StoreEngine → Addons. Scroll through the list or use the search bar to find Razorpay.
Toggle the switch to turn the Razorpay addon ON. After enabling, click the Settings icon from the “Setup Razorpay Payments” section.
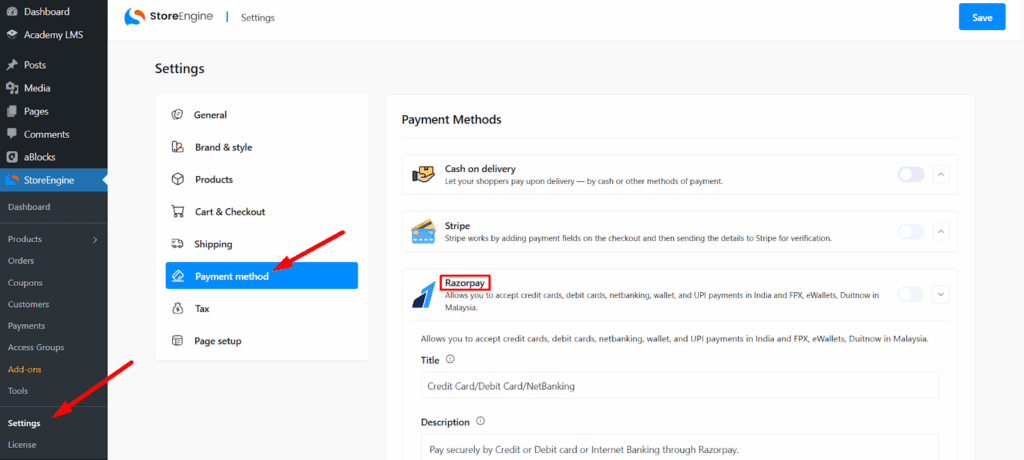
Alternatively, you can find it by going to StoreEngine → Payment Methods and selecting Razorpay. Once enabled, you can proceed with configuring your Razorpay account details for payment processing.
Configure Razorpay Settings
Once you have enabled the Razorpay addon, follow these steps to configure it:
Set the Payment Title
In the Title field, enter the name you want customers to see during checkout (e.g., Credit Card/Debit Card/NetBanking).
Add a Description
In the Description field, write a short message describing the payment method (e.g., Pay securely by Credit or Debit card or Internet Banking through Razorpay).
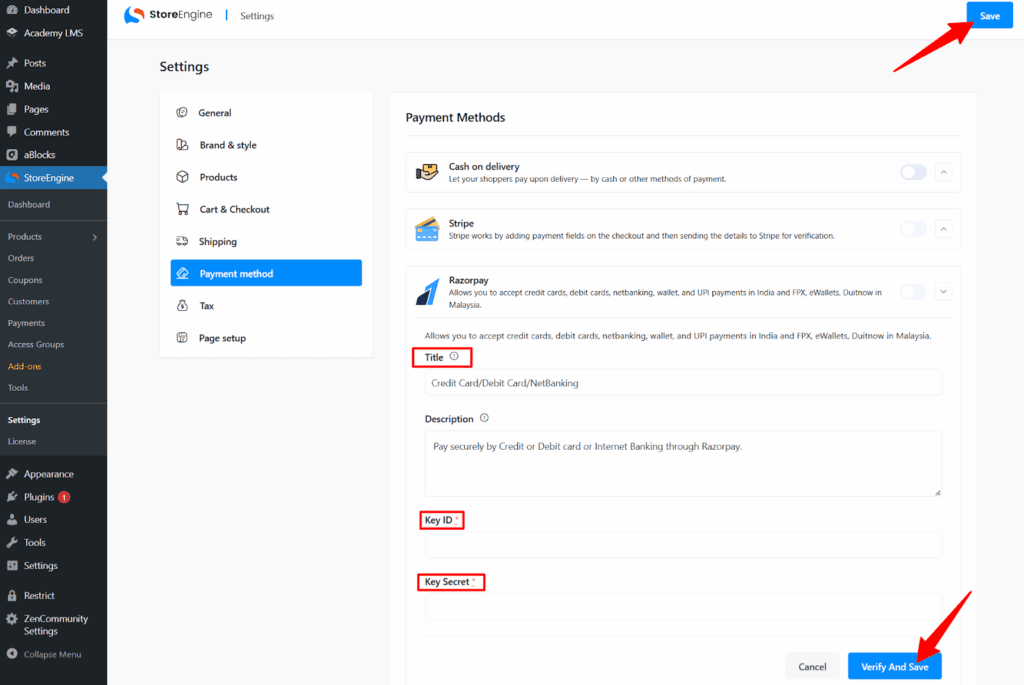
Enter Razorpay API Credentials
- Key ID – Enter your Razorpay Key ID from your Razorpay Dashboard.
- Key Secret – Enter your Razorpay Key Secret from your Razorpay Dashboard.
Note: If you want to test payments via Sandbox mode, use your Sandbox Key ID and Sandbox Key Secret in the respective fields.
Verify and Save
Click Verify and Save to confirm your credentials. Once verified, click Save at the top right to apply the changes.
Your Razorpay payment gateway is now ready for use in your StoreEngine store.