


Integrating Google Analytics with StoreEngine allows you to track user activity, purchases, and engagement on your store. By enabling the analytics integration option in StoreEngine and adding the Google Analytics tracking script to your website header, you can monitor important metrics directly from your analytics dashboard.
CREATE A GOOGLE ANALYTICS ACCOUNT
Before enabling the integration, you need to create a Google Analytics property.
Follow these steps:
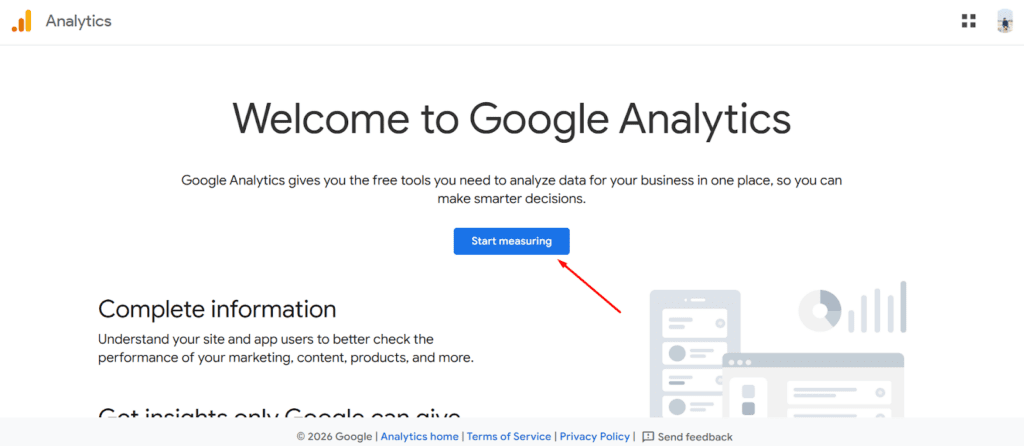
- Go to Google Analytics.
- Click Start measuring.
- Create a new Analytics account and property for your website.
- After setup, Google will generate a Global Site Tag (gtag.js) tracking script.
COPY THE GOOGLE ANALYTICS TRACKING SCRIPT
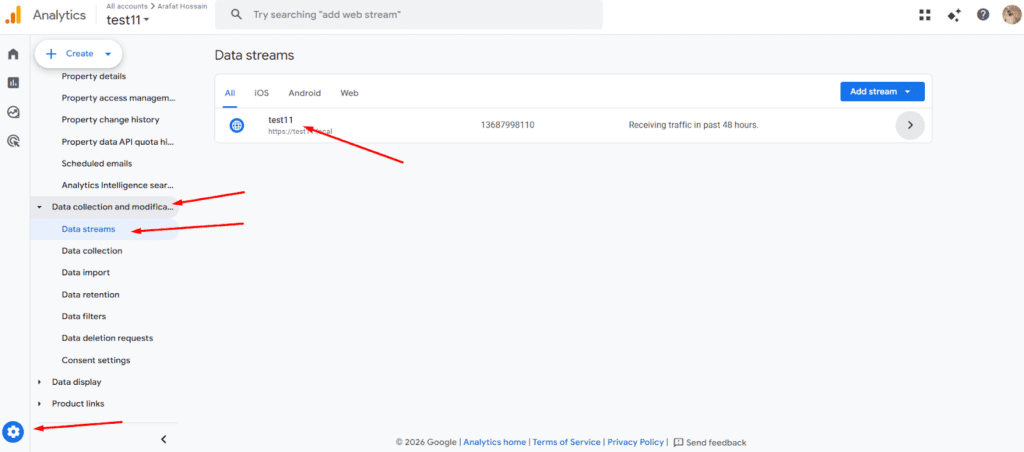
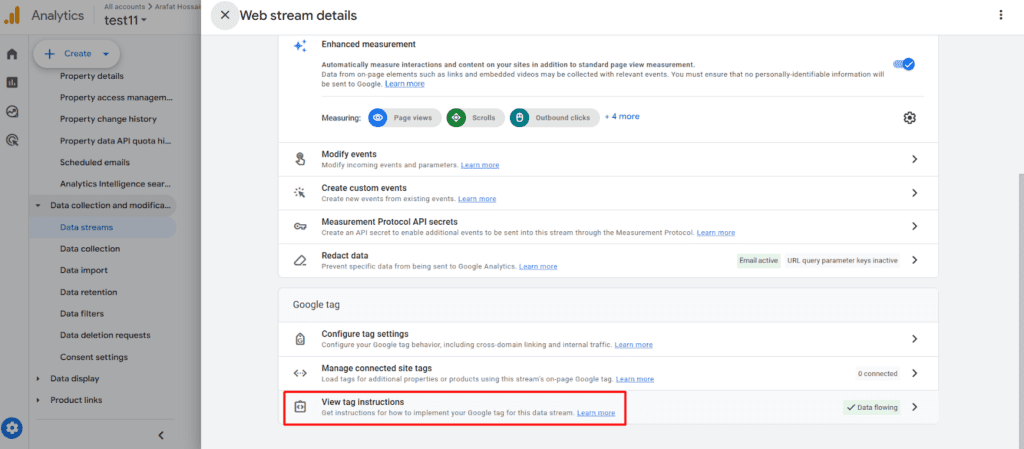
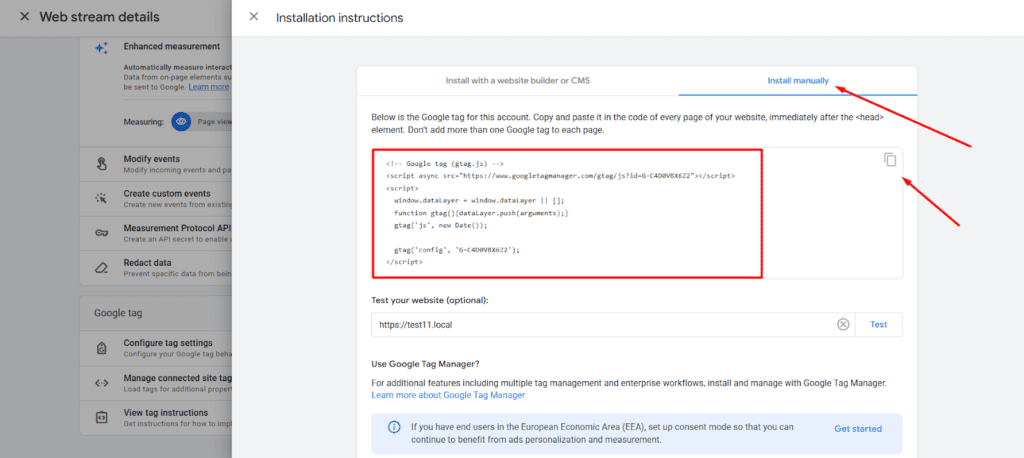
After creating your property:
- Open your Web Data Stream.
- Locate the Global Site Tag (gtag.js) code snippet.
- Copy the full tracking script provided by Google.
ADD THE TRACKING SCRIPT TO YOUR WEBSITE
StoreEngine does not directly store the tracking script. Instead, you need to add it to your website header using a third-party plugin.
Follow these steps:
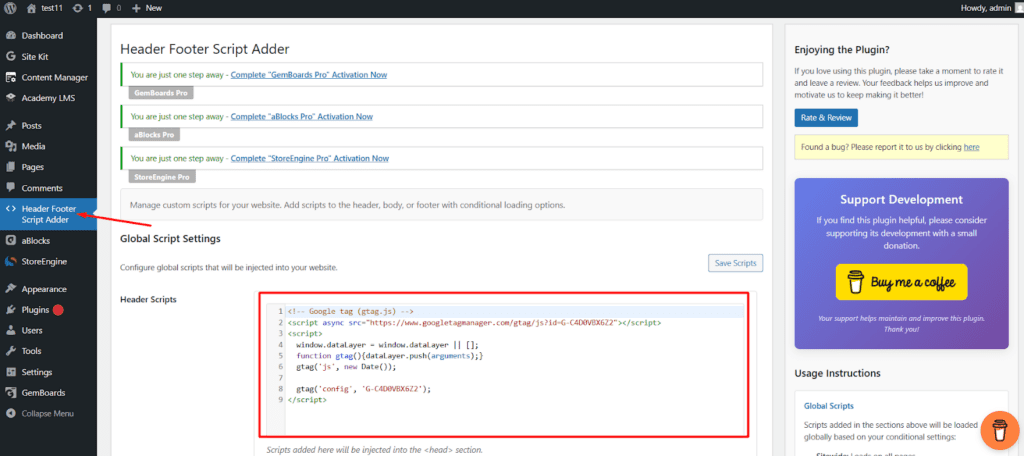
- Install a header script plugin, such as Header Footer Script Adder or any similar plugin.
- In your WordPress dashboard, go to Header Footer Script Adder.
- Locate the Header Scripts section.
- Paste the copied Google Analytics tracking script into the header field.
- Click Save Scripts.
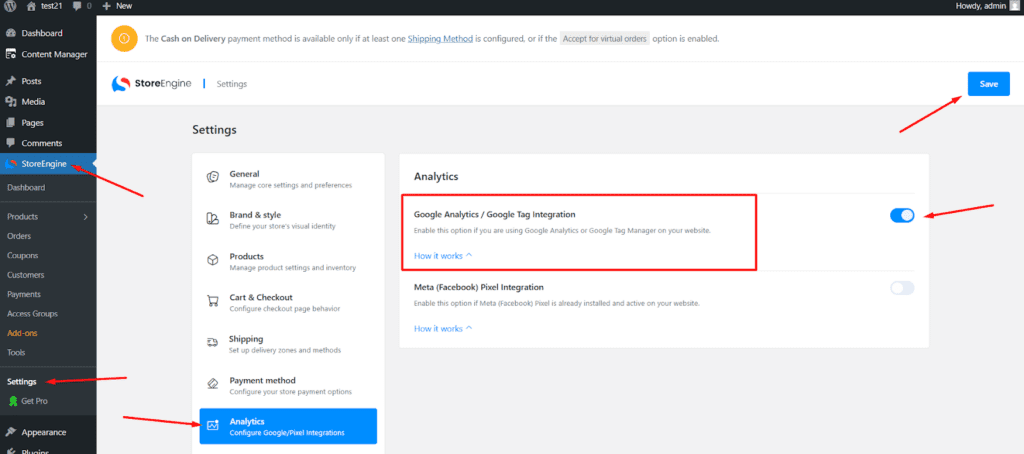
ENABLE ANALYTICS IN STOREENIGNE
Once the tracking script is added, you need to enable analytics tracking in StoreEngine.
Follow these steps:
- Go to StoreEngine → Settings in your WordPress dashboard.
- Select the Analytics tab.
- Enable the Google Analytics / Google Tag Integration toggle.
- Click Save.
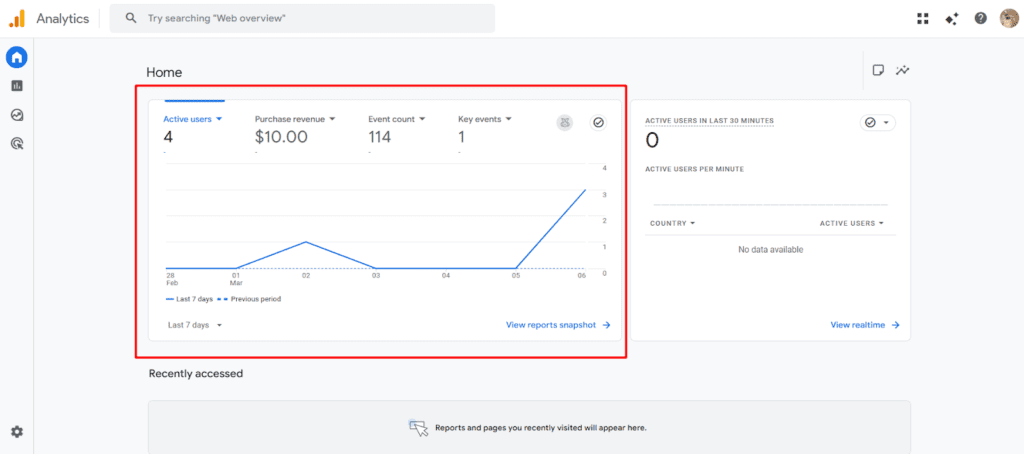
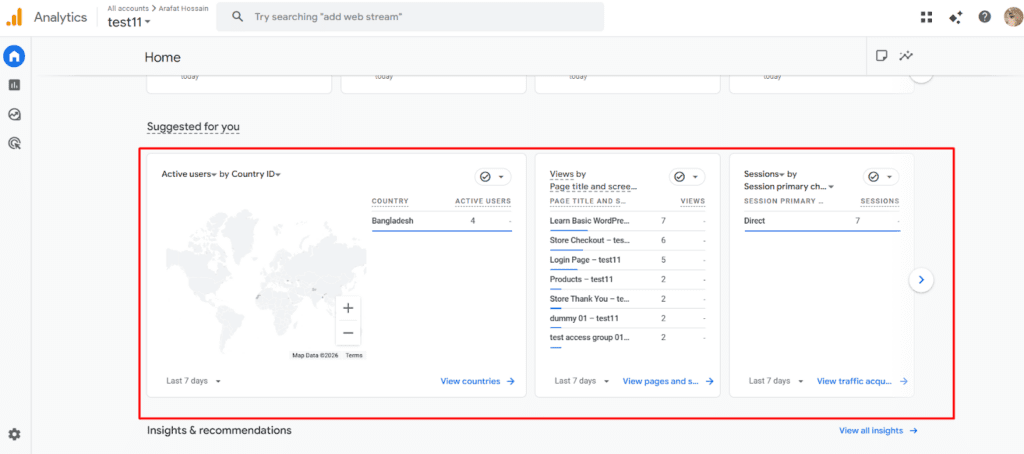
VERIFY DATA IN GOOGLE ANALYTICS
After enabling the integration, visit your website and perform some actions such as browsing products or completing a test order.
Then check your Google Analytics dashboard.
- Open your Google Analytics dashboard.
- Navigate to the Home or Reports section.
- Look for metrics such as:
- Active users
- Purchase revenue
- Event count
- Key events
- And, so, on…
IMPORTANT NOTES
Disable Ad Blockers
Do not use ad blockers or browser extensions that block tracking scripts. These tools may block the analytics request from reaching Google servers, which prevents data from being recorded.
Previous Data Will Not Appear
Google Analytics will not display past data collected before the tracking script was installed. Only new data generated after the integration will appear in the dashboard.
Data May Take Time to Appear
It may take some time for data to appear in your Google Analytics dashboard. In many cases, data appears within minutes, but some reports may take several hours to update.
Use a Third-Party Plugin for Script Placement
The Google Analytics tracking code must be added to your website header using a third-party plugin (such as Header Footer Script Adder) or another method that injects scripts into the <head> section of your site.
BENEFITS OF GOOGLE ANALYTICS INTEGRATION
- Track store traffic and user behavior
- Monitor sales performance and revenue
- Analyze product engagement
- Measure marketing campaign effectiveness
Make data-driven decisions to grow your store