


What it does: Build sales funnels — a guided path of pages that takes a shopper from a landing page, through a custom checkout, into one-click upsell offers, and finally to a thank-you page. It’s a great way to raise your average order value.
Beta feature. It works well, but is still being polished. Test your funnel with a real (or test) purchase before going live.
Free vs Pro: Building funnels, the custom store checkout, and analytics are Free. The one-click “add it to my order without re-entering a card” upsells, conditional offers, and A/B testing need StoreEngine Pro.
Turn it on
- Go to StoreEngine → Add-ons.
- Turn on Funnel Builder.
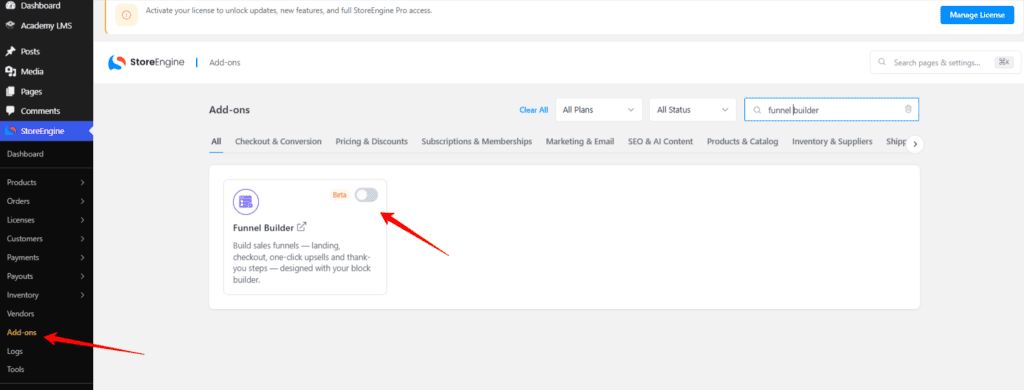
- A new Funnels menu appears in your StoreEngine sidebar.
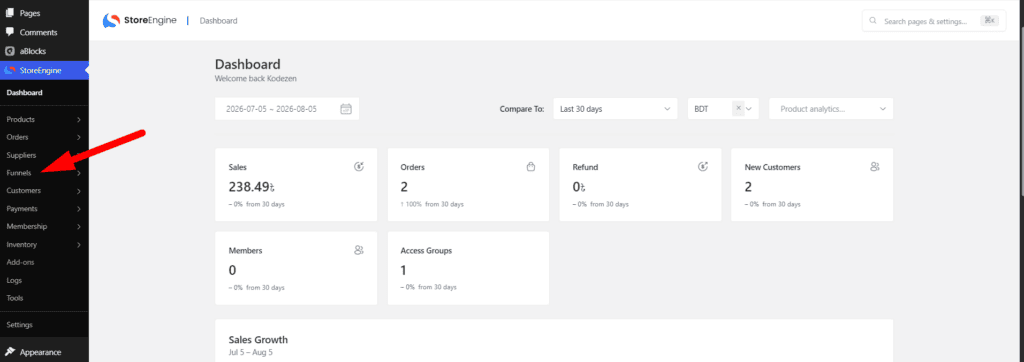
The Funnels menu has three areas:
- Funnels — your list of funnels (this is where you build them).
- Store Checkout — turn one funnel into the checkout your whole store uses.
- Analytics — see views, orders, revenue, and average order value per funnel.
Understand the building blocks
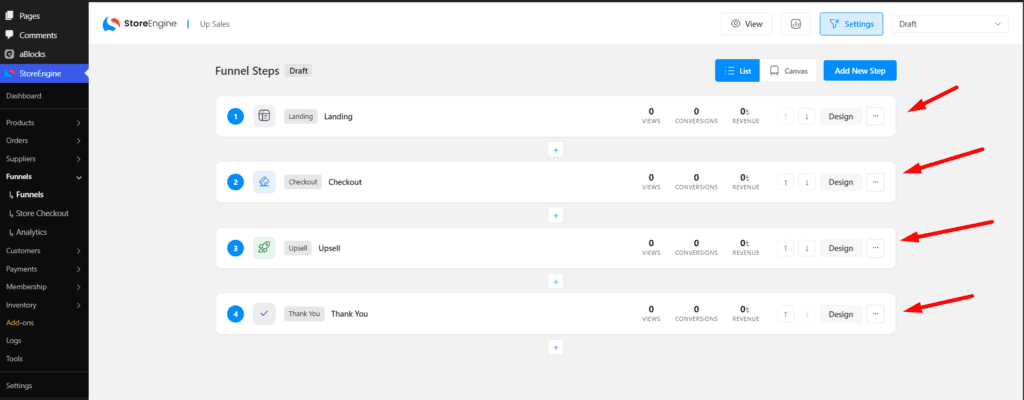
A funnel is a series of steps. Each step is a real page you design with your normal block/page builder. You can use any of these step types:
|
Step |
What the shopper sees |
|
Landing |
A marketing page that introduces the offer |
|
Opt-in |
A page to capture an email/lead |
|
Checkout |
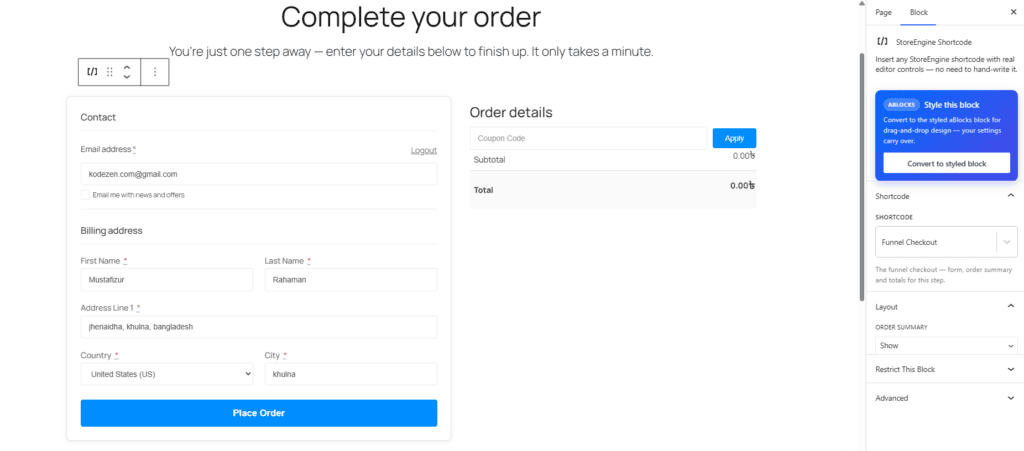
The buy form with an order summary |
|
Upsell |
A one-click “add this too” offer after they buy |
|
Downsell |
A cheaper backup offer if they decline the upsell |
|
Thank-you |
The confirmation page |
You don’t need every step — a simple funnel can be just Checkout → Upsell → Thank-you.
Create your first funnel
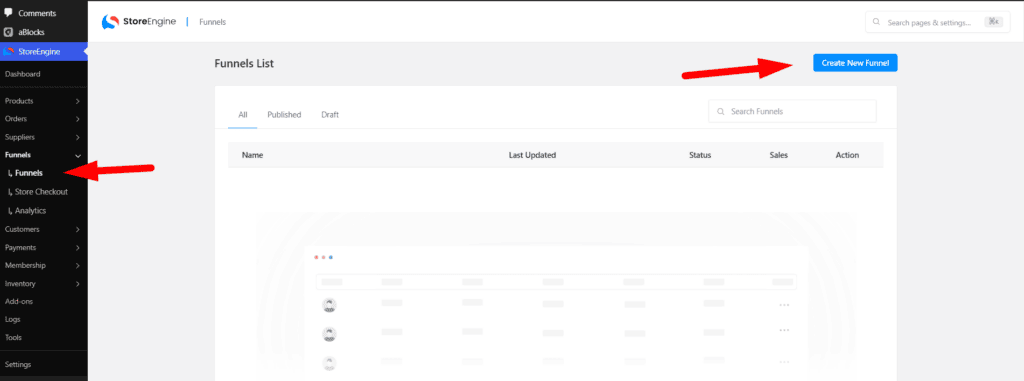
- In Funnels, click Create Funnel and give it a name.
- Choose how the funnel is triggered:
- Manual — a standalone funnel you link to yourself (from an ad, email, or menu).
- On product purchase — the funnel runs when a specific product/price is bought.
- Store checkout — this funnel becomes your whole store’s checkout (see below).
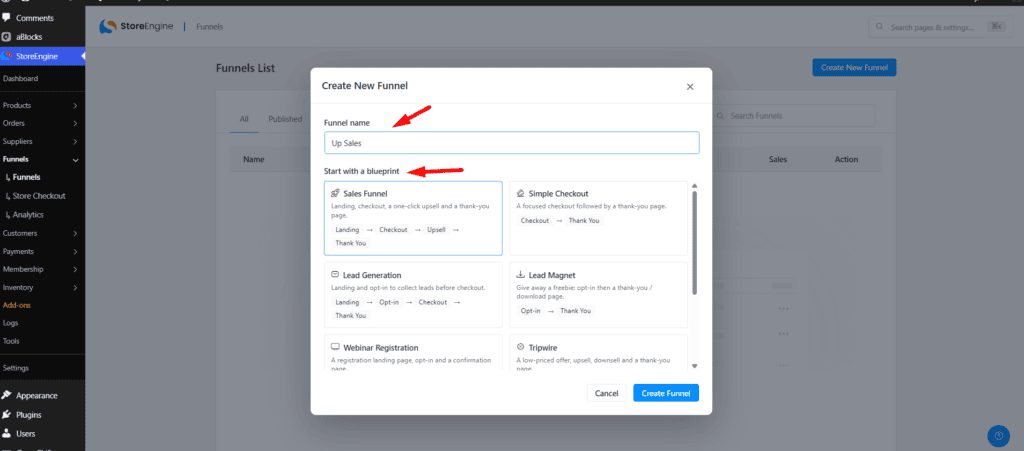
- Add your steps in order and design each step’s page with the builder.
- On the Checkout step, pick the product (price) and quantity to sell. Optionally turn on Replace cart so only this funnel’s product is purchased.
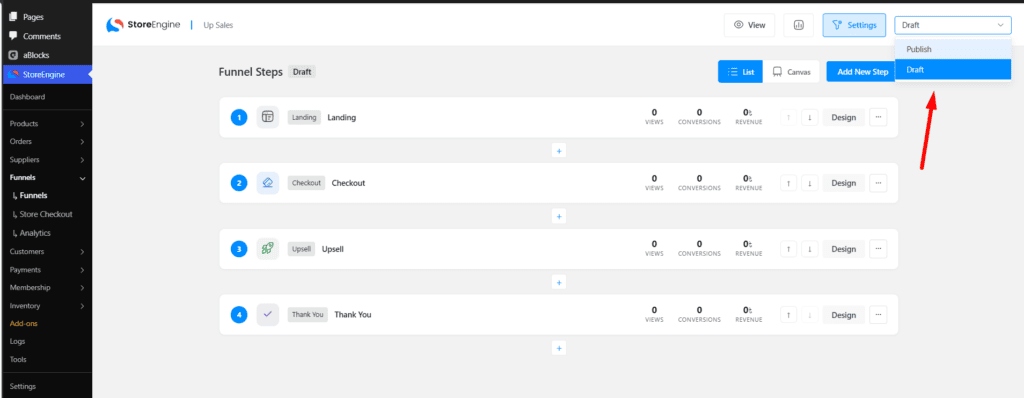
- Set each step to Publish when it’s ready. Only published step pages go live.
Tip: leave a funnel as Draft while you build it, then flip it to Publish.
Add a one-click upsell (the money-maker)
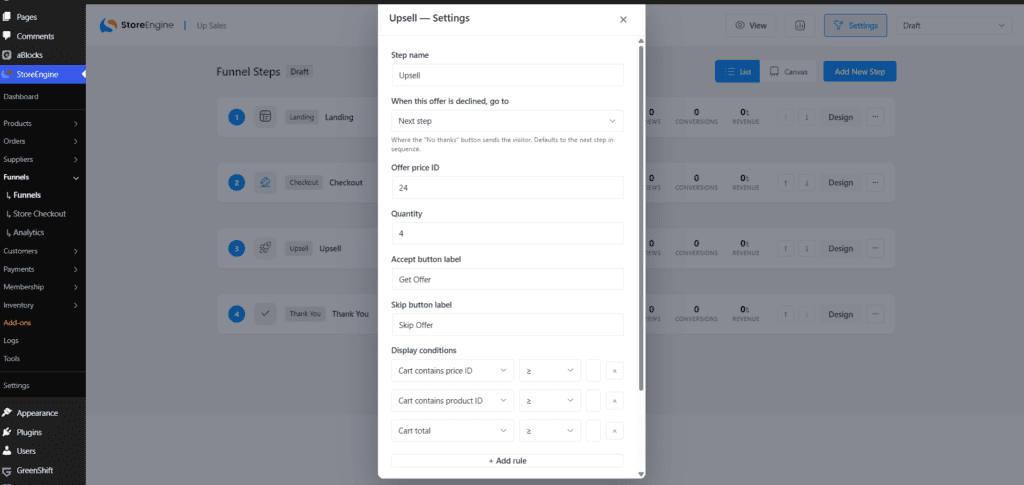
On an Upsell or Downsell step:
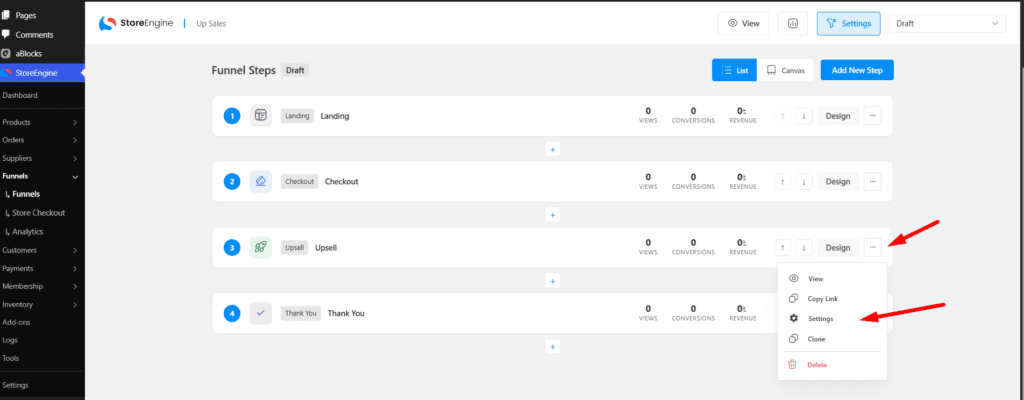
- Choose the offer product (price) and quantity.
- Write the offer title and description.
- Set the button labels — the defaults are:
- Accept: “Yes, add this to my order”
- Decline: “No thanks”
- Under When this offer is declined, go to, pick the next step (e.g. send them to a downsell, or straight to thank-you).
With StoreEngine Pro, when a shopper clicks accept, the item is charged to the card they just used — no re-entering payment details — and added to their existing order. Without Pro (or on a gateway that doesn’t support it yet), the accept button simply moves them to the next step instead of charging instantly.
Use a funnel as your store checkout
Want every checkout on your store to run through a funnel (so you can add upsells to all orders)?
- Build a funnel that starts with a Checkout step.

- Go to the Store Checkout tab and set this funnel as the active store checkout.

Only one published store-checkout funnel can be active at a time.
Read your results (Analytics)
The Analytics tab shows, per funnel:
- Views and unique views

- Orders / conversions

- Revenue and extra offer revenue from upsells

- AOV — average order value
- RPUV — revenue per unique view
Use these to see which upsell offers are actually earning you money.
Pro-only extras
- One-click post-purchase upsells — charge the saved card instantly, no re-entry (Stripe supported first).
- Conditional offers — only show an offer when rules match (cart total, item count, contains a certain product, etc.).
- A/B testing — test two versions of an offer and let StoreEngine track which converts better.
Troubleshooting
- My step isn’t showing — make sure that step’s page is Published, not Draft.

- The upsell asks for a card again — that’s the free behaviour, or the gateway doesn’t support one-click yet. You’ll see: “The payment gateway used for this order does not support one-click charges yet.” Use StoreEngine Pro with Stripe for true one-click.
- A “minimum core version” notice appears — update StoreEngine to the latest version; the Pro upsell features need core 2.0.0 or newer.